
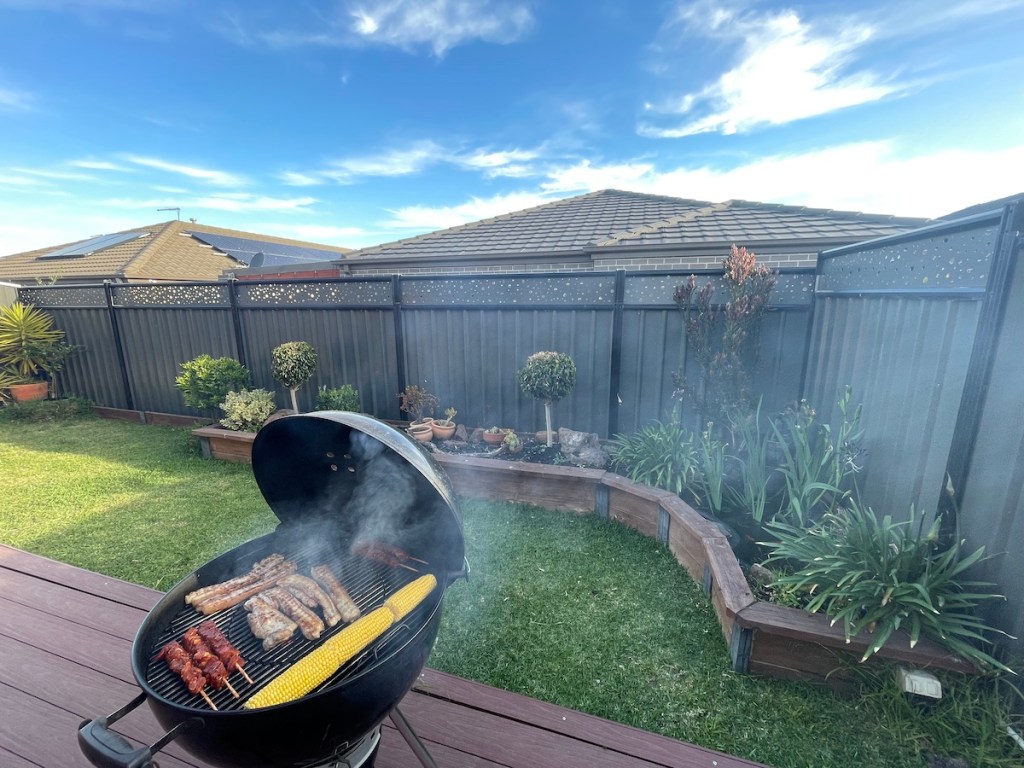
It’s spring in Australia and like most dads down under, I am excited to bring out the barbie for some outdoor dining with the family – just or a change. But first, we have to spruce up the backyard. While the plants and lawn are recovering from the unforgiving winter frost, we start to come out of hiding to see what needs fixing, or to find any potential upgrades – it’s an endless cycle. Not complaining, I love getting my hands dirty.
This time, my fence is the lucky draw winner. In this blog I will walk you through the problem, the solution, the steps I’ve taken, and a few handy tips to consider in putting up an extension for a colorbond fence.
Let’s jump in.
The Problem
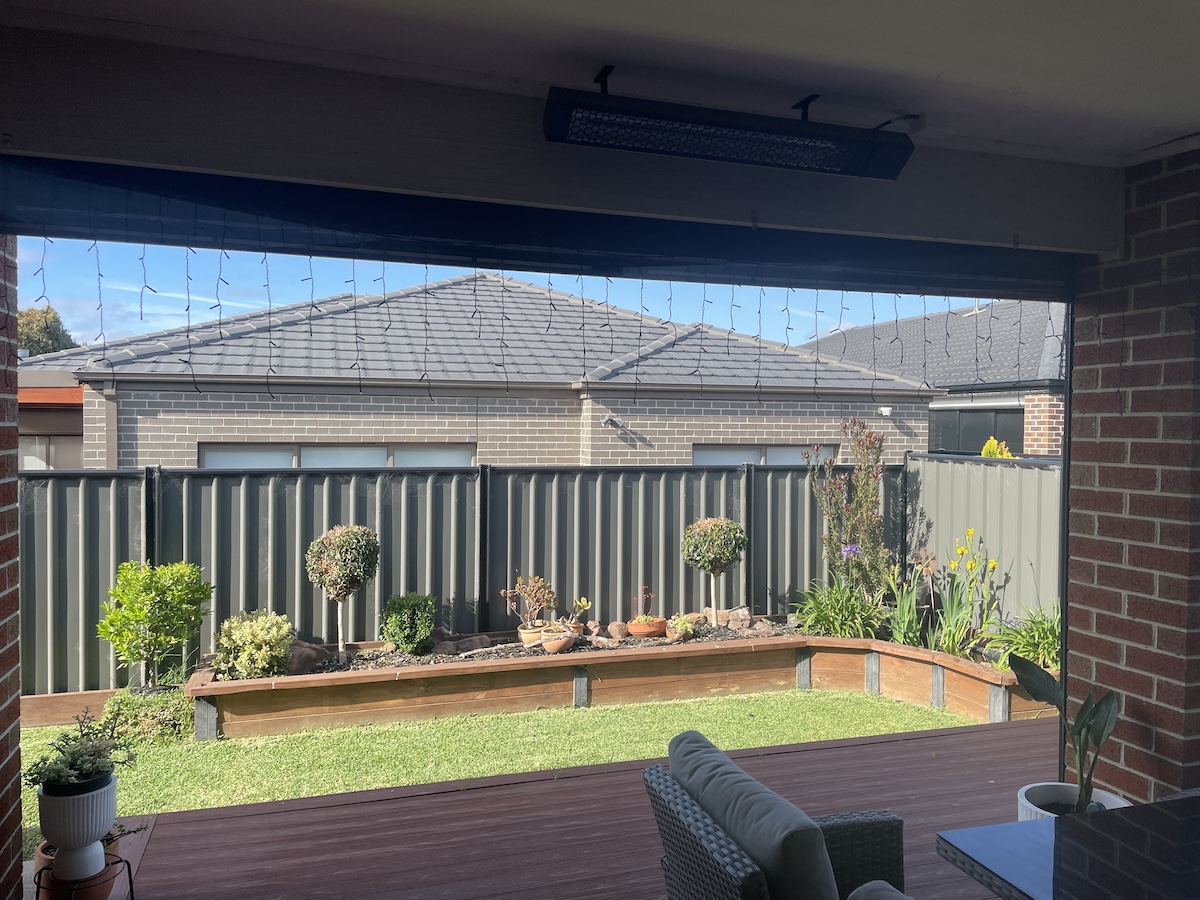
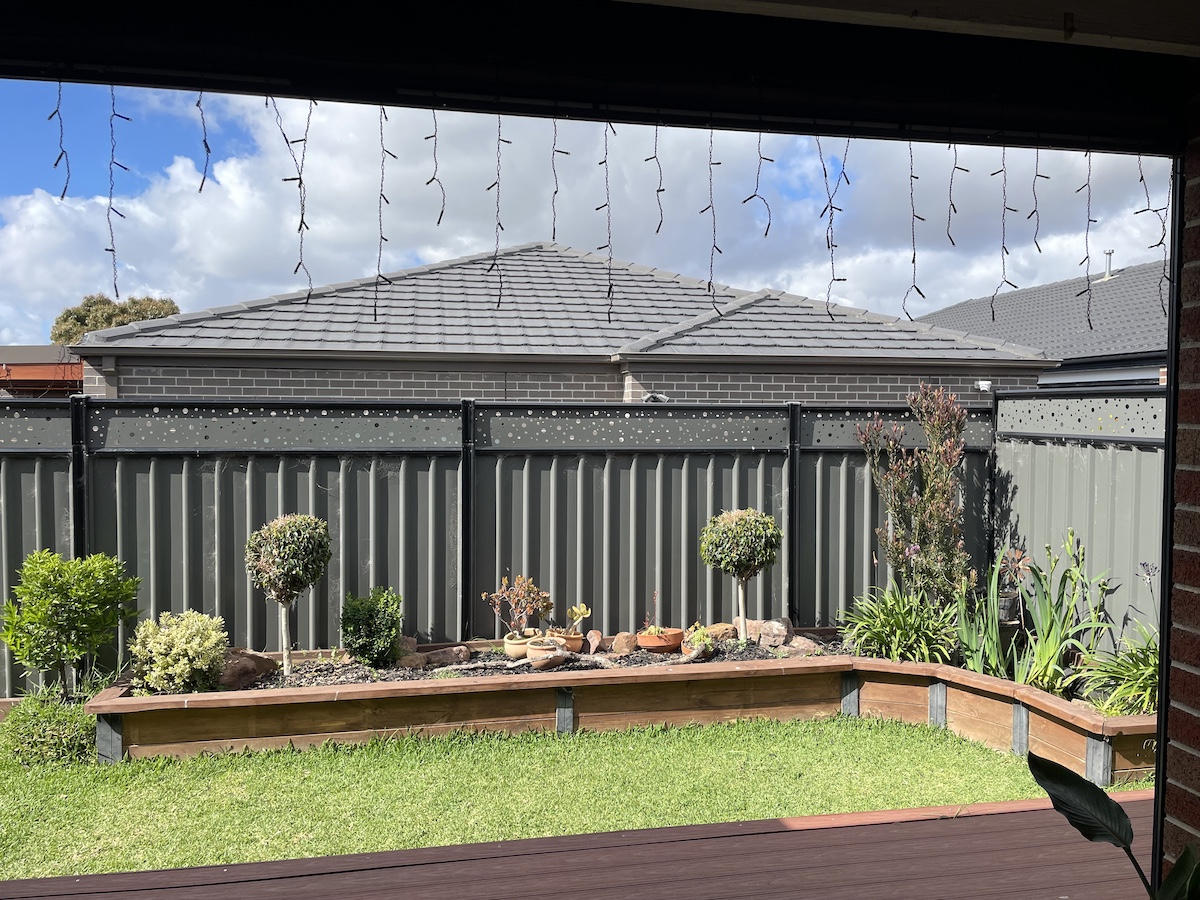
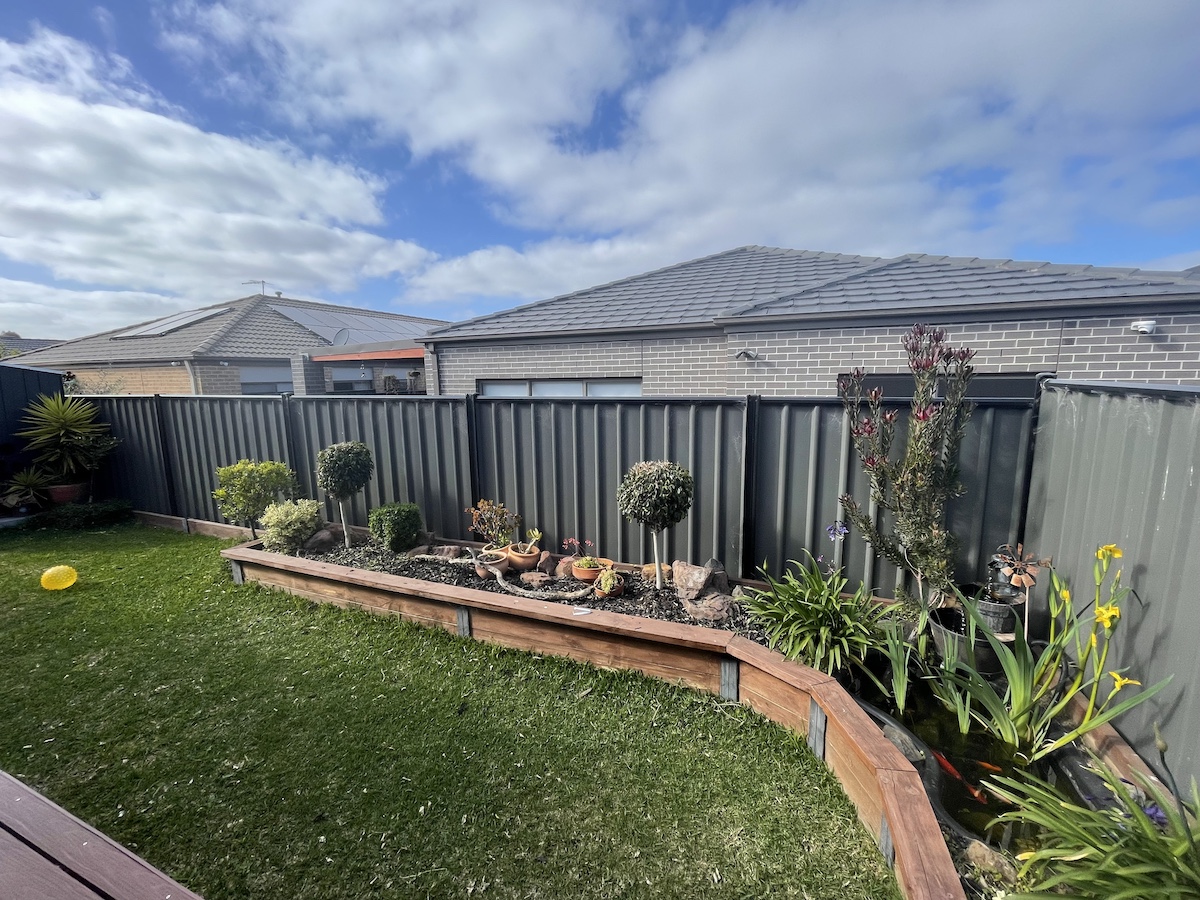
My biggest DIY project to date is the planter box made with steel upright posts and treated pine sleepers. Since then, it has become the focal point of my backyard but it also draws attention to one tiny problem – the neighbour’s back door and windows. Behind the planter box is our colorbond fence which sits on the lower end of the slope. We are literally standing on higher ground and as a result, we can see over the fence and straight through the neighbour’s glass door.
Not sure if my description makes sense but here’s what it looks like:
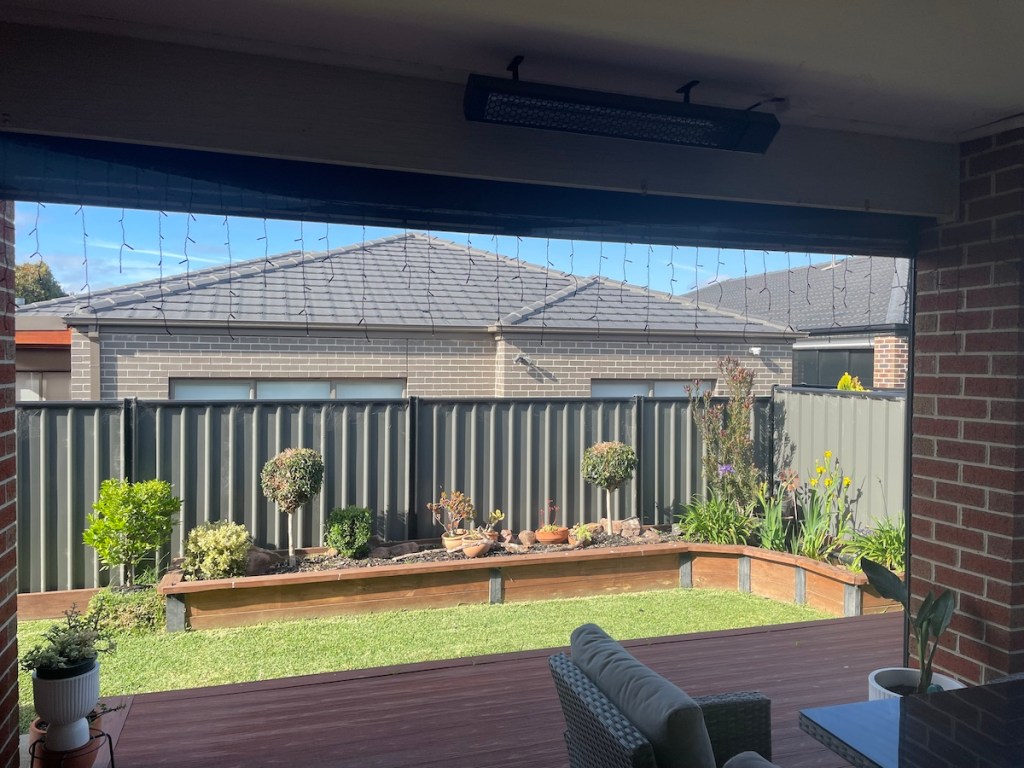

As you can see, their blinds are down. It’s always down and it could be for privacy reasons. I feel like they need to have their privacy as much as I want mine. And for the good neighbour that I am, I’ll build something that would benefit both sides of the fence.
The Solution
There are a few different ways to block that view – fence screening, bottom sleepers, extensions, you name it. I’ve done some research and made my decision based on:
- Budget – It has to be cost-efficient. Sounds too “corporate-y.” Okay, bang for your buck / value for money. 🙂
- Convenience – it has to be quick and easy to install. I have a full-time job and I have kids, one being a toddler. Time is a luxury.
- Style – I want it to look good. I like staring at my backyard so I want something that will add some aesthetic value.
- Quality – Winds can get crazy in my area at times. Flimsy materials and poor design just won’t cut it. This is one of the top priorities.
One of the very first Google search results is a company called Screenline. The ordering system and the website itself is one of the best, if not the best among its competitors. And I have to say, they have the best customer service staff. They responded to emails really fast – took just a few minutes to get answers. And this is not a sponsored post, just giving them the credit they deserve.
Planning
Planning for this project is easier than most of my other DIY projects. You only need to:
- Measure the length/width (post intervals). Usually, it’s around 2400mm from one post to the other.
- Count the panels/sheets. That area in between two posts (that you just measured) counts as one panel/sheet. In my case, I have six.
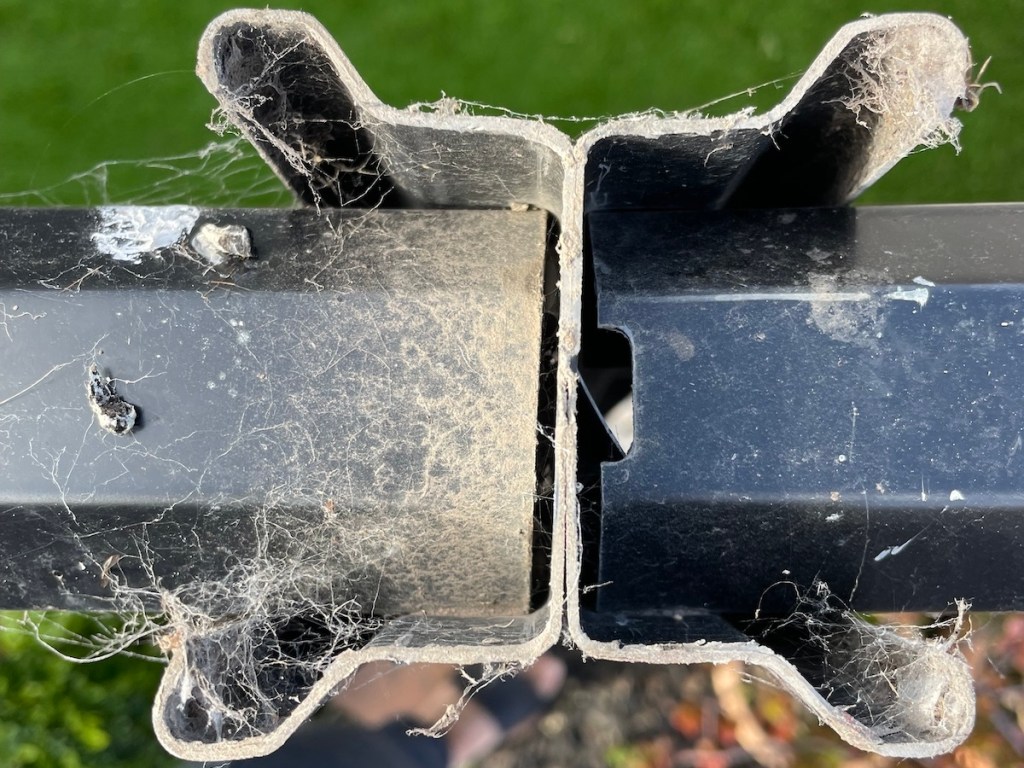
- Check your post type. To do this, take off the post cap, if any, and take a photo from the top to see the post shape. Looks like this:
Steps
Here’s a step-by-step process of installing the fence extension kit. You will see that it is not perfectly the same as the manual but it works perfectly. And besides, manuals are for the weak. Kidding. Please read the manual.
Tools:
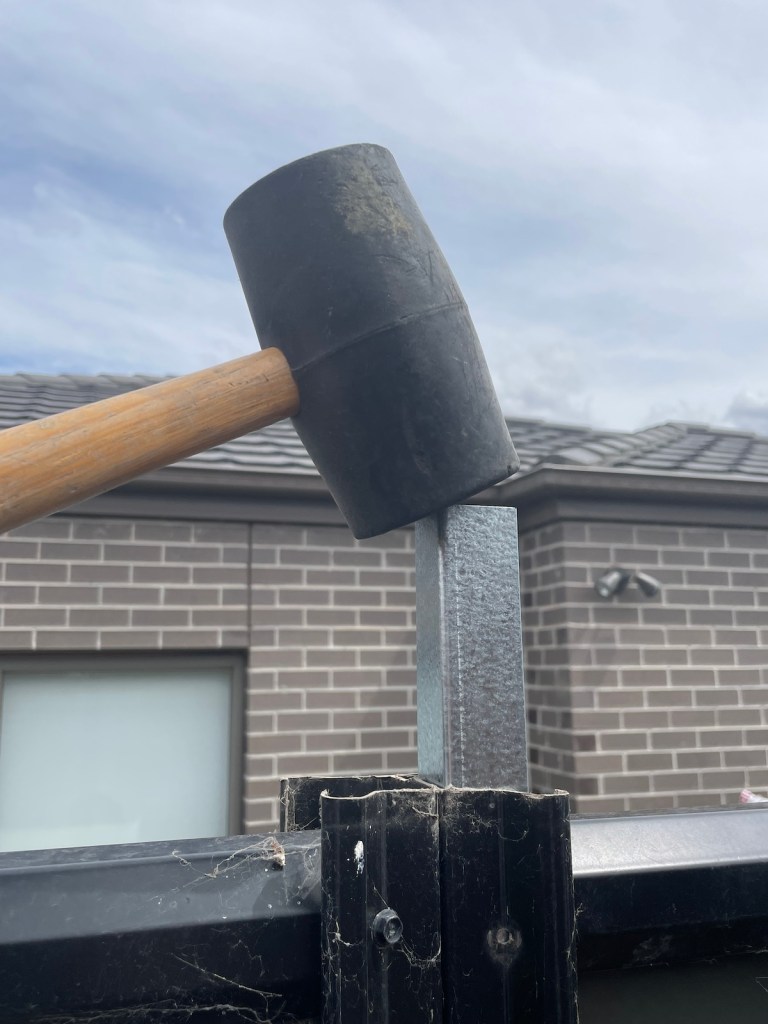
- Rubber mallet – this will make inserting the “joiners” a lot easier.
- Electric drill – this is for driving the self-drilling screws.
- Angle grinder – this is the easiest way to cut through the sheets and top rail if needed. You will most likely need this.
Safety Precaution: Always wear gloves in handling each part. And goggles when cutting with an angle grinder.
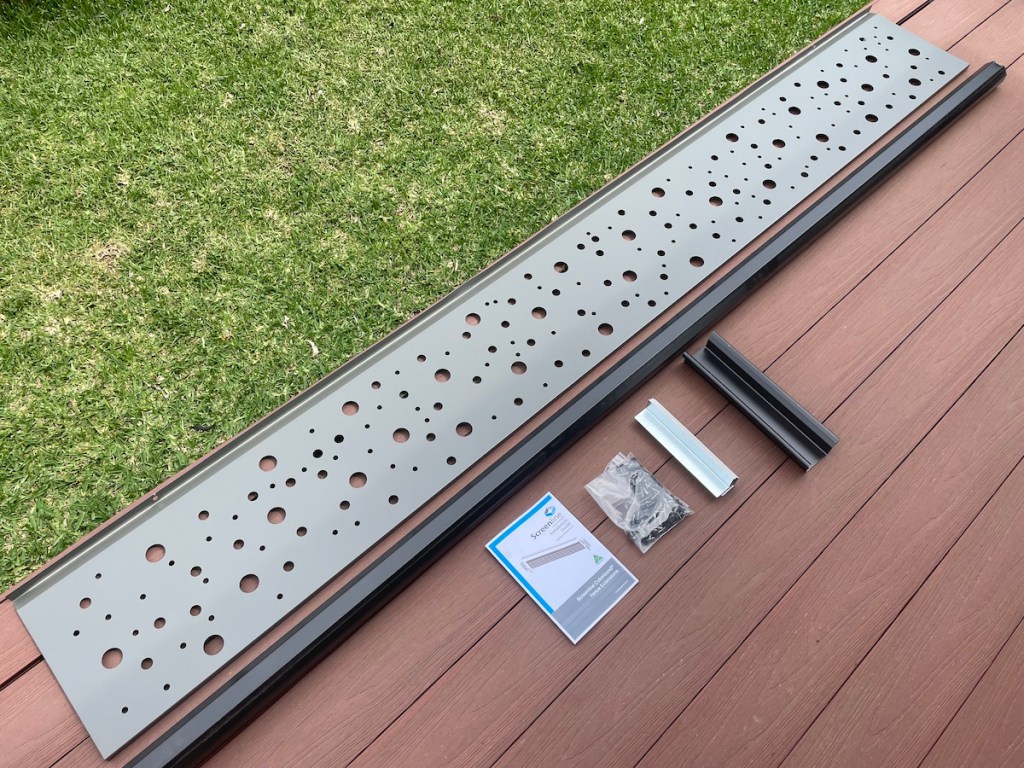
Step 1: Unbox/unwrap
This comes as a kit, meaning it has all just the right parts/components needed to install the fence extensions. Do not take this step lightly. It’s nicely wrapped in plastic and you would want to be careful when using sharp tools for unwrapping – it can get easily scratched.
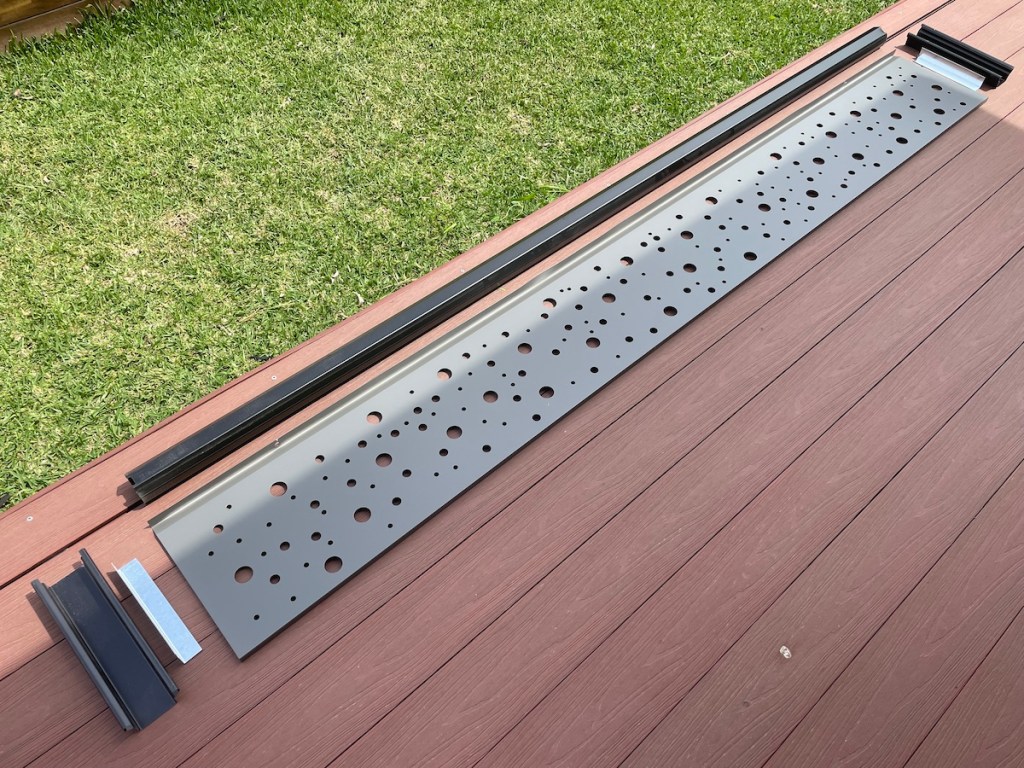
Lay all the components nicely, this way you’ll get to have some visual – a plan in mind.
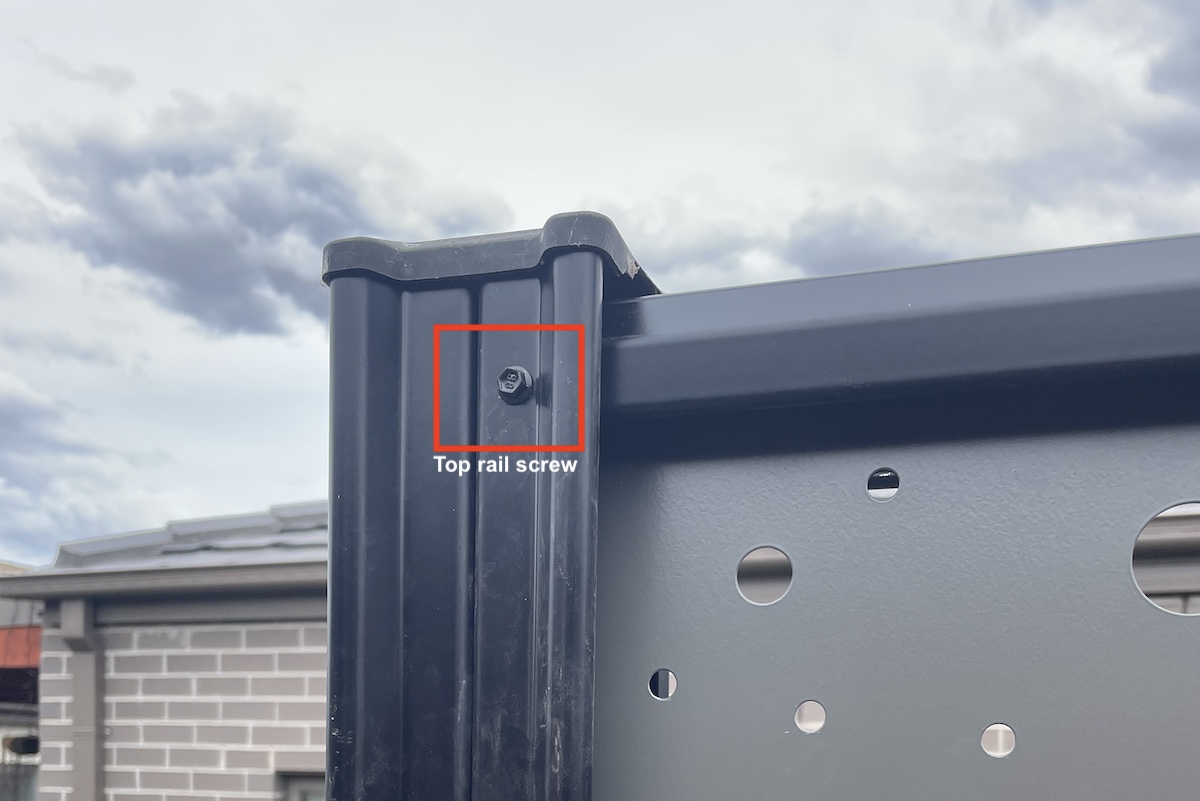
Step 2: Unscrew the post.
You need to do this so you can insert the silver metal thing (the “joiner”).

Step 3: Insert the “joiners“
Make sure to push halfway through. This is actually the thing that holds everything in place.

Step 4: Put the post extension in place.

Step 5: Repeat steps 3 to 4 on the next post.
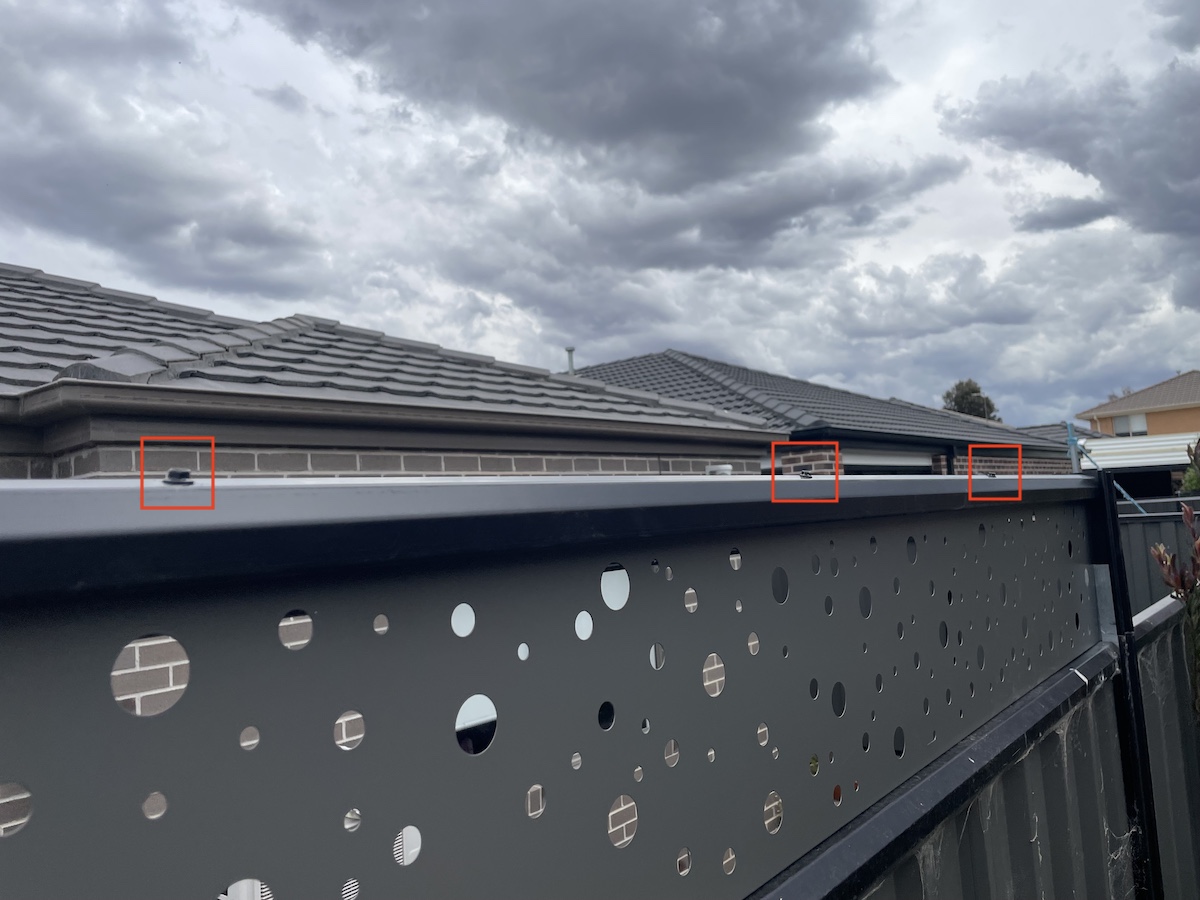
Step 6: Put the panel and top rail in and secure with screws.
Please refer to the manual, there’s a “right way” where the panel should be facing. I just forgot to take a photo.

Note: This blog gives you some real-life visuals but please check the manual for the actual steps. They’ve done a better job than me to be honest. 😀
Handy Tips
This kit is so easy to put together you can’t get it wrong. However, here are a few tips to consider to get the best out of this build.
- Check the levels and angles – you don’t need a spirit level for this but when securing the “screw points” always check that the extensions are standing straight up and not leaning on one side. Even a slightly noticeable slant is an eyesore.
- Sand the existing posts – depending on how well your fence contractor did the job, you may or may not have a perfectly cut post. I found that a few of my posts were not evenly cut and it will leave gaps on the joint or worse, leave you with a slightly slanted extension post. A simple solution is to level it out with an angle grinder before installing anything – easy prep work but worth it.
- Check with your local council – councils have different rules and guidelines on fence heights. It is best to check with your local council. I phoned ours and luckily, it is within the limit. But in reality, I don’t think someone will check (you did not hear it from me).
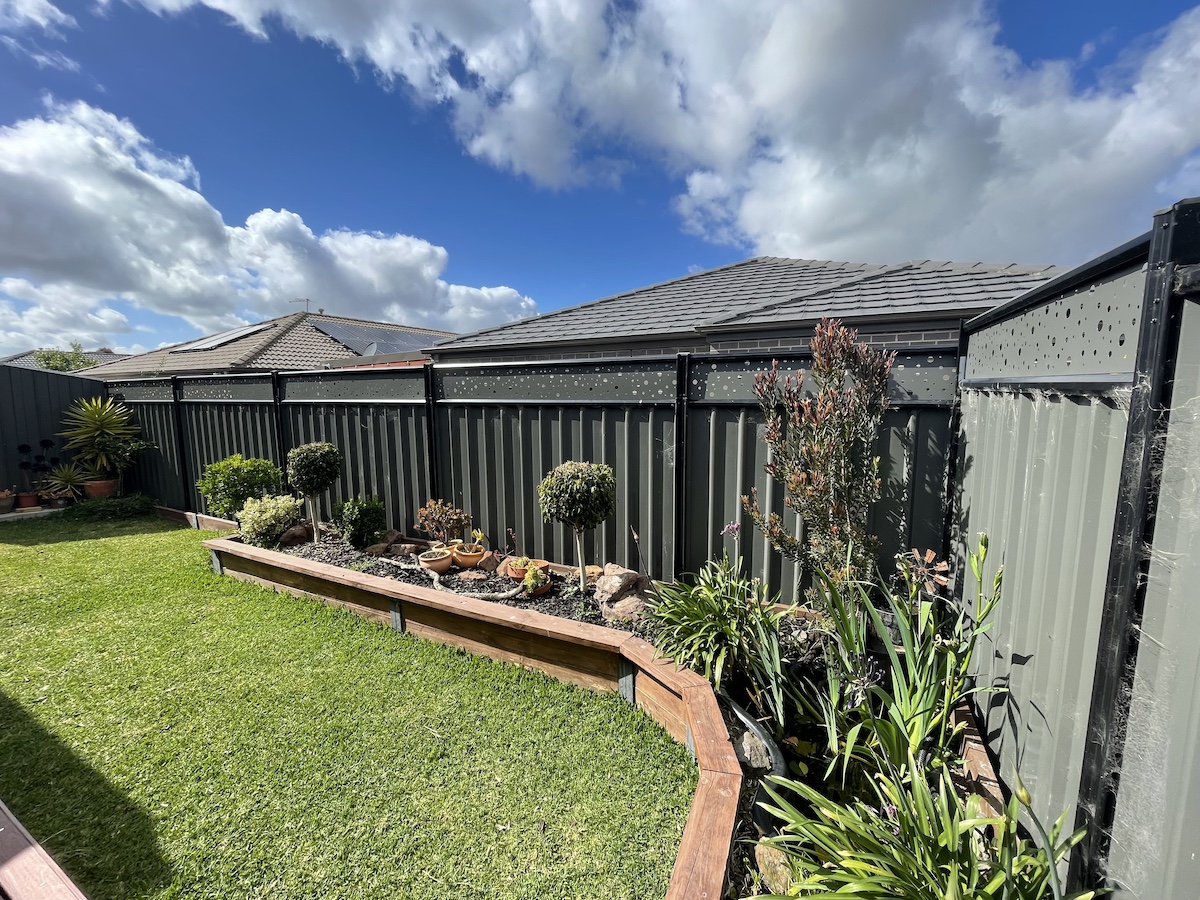
Before & After
Here’s the big reveal. Drum roll…
The Good, The Bad & Nothing Ugly
I’ll start with the things that I didn’t like much about this whole thing:
- Colour names on the website – the colour samples and naming conventions on their site can be tricky. It was hard to decide which shade of grey would match mine, for example. But everything worked out well in the end, thanks to the excellent customer service. And I’ll make it clear, they still have the best e-commerce site among competitors that I’ve come across.
- Price – though it is still within my budget, it’s on the pricey end when compared to the other options. The good thing is, it’s so easy to install you won’t need to pay for a handyman.
Things I liked:
- Build quality – this thing feels solid. I don’t think any gusts of wind in my area can knock it over. Knock on wood, I don’t want to jinx it. Plus, it’s colorbons, I don’t see it getting warped by the Aussie heat and winter frost.
- Design – I really dig the way it looks. I think it’s neat, simple and stylish at the same time. They have four designs to choose from including the more traditional but timeless slats and lattice patterns.
- Maintenance – I expect maintenance to be nothing more than the occasional cleaning from cobwebs and bird droppings. There will be no to sand-stain-oil, or weekly trims.
- Assembly – let me put it this way – it looks too good for the effort of putting it up. I mean, you’ll get a great result without much difficulties. I hope that makes sense. 🙂
- Cost-sharing Potential – because the panels look the same on both sides, both sides of the fence get the same benefits which is a good reason split the bill, if possible. And the neighbour can also lend a hand during the build.
Conclusion
I will say that this is one of the easiest DIYs I’ve done so far. Needs a bit of precision but it’s not physically demanding at all – no gruelling ground prep work needed like my paver projects. Most importantly, it gave my backyard a whole new feel, upped the aesthetics and added a much needed sense of privacy. I’m sure the neighbours on the other side love it too.
Now we can take out the barbie.
Do you have a similar backyard issue? What options do you have in mind? Share it in the comments.
