With the Covid numbers still surging in Victoria, the Government has issued a stage 4 lockdown which enforces a few more restrictions. For example, one can only go within a 5-kilometer radius from home. To be honest though, having been compliant with all the rules and restrictions over the past few months, stage 4 lockdown doesn’t really feel that bad.
Anyway, here’s my way of keeping myself busy at home. And if you are someone like me, working from home since the pandemic hit, then consider making this project to spruce up your workspace view. There’s a reason why bosses want the corner office with the best views. 😉
Let’s get straight to it.
The Plan
The plan is simple:
- Put up a timber screening to cover up the fence. It has to stand a little higher than the fence to block the neighbour’s window for added privacy.
- Add some wall hanging pots and plants to give it some life. This is optional but it does get the missus on board, which makes things a lot easier, especially the finance part. Thank me later. 🙂
What You Need
Below are the materials that I used for this project. I have included links so you can easily check for updated prices.
| No. | Material | Quantity | Notes |
|---|---|---|---|
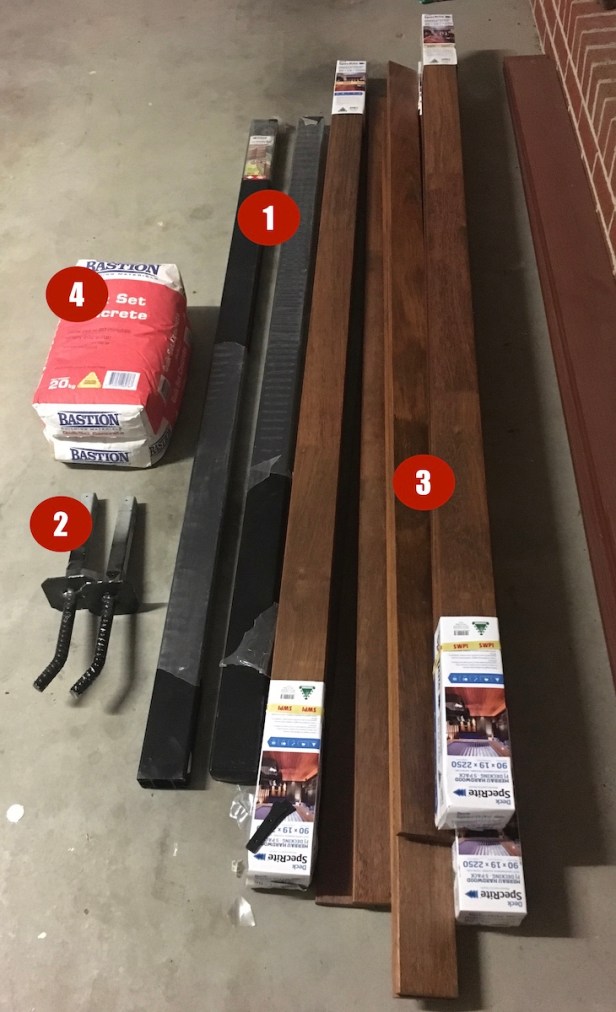
| 1 | Whites Screen Up Joiner Posts 2m | 2 | The posts come with 20mm spacers. I haven’t counted how many but it’s more than enough for this project. There are 10mm spacers sold separately if you prefer smaller gaps for added privacy. One advantage of using these posts is that you can use the other side should you decide to put an extension. |
| 2 | Whites Screen Up Anchor Plates | 2 | These are designed for pouring concrete into post holes. If you have an existing concrete slab, use the Whites Screen Up Base Plate, it would be much easier. |
| 3 | 90 x 2.25 x 19 Merbau | 18 | Boards have to be 19mm thick to fit the posts. The 2m posts will need 18 pieces of this 90mm wide boards. Since the Specrite pre-oiled merbau comes in 5s, I bought 4. Total of 20 boards. A bit more than what’s necessary but having a few extra is always a good idea. |
| 4 | Fast Setting Concrete | 4 | My post holes were approximately 400mm deep, 200mm x 300mm wide. The photo shows 2 bags, and yes, I had to go to Bunnings for 2 more. |
Steps
Dig 2 post holes, approximately 2.25m apart. Measure from the center of the holes.
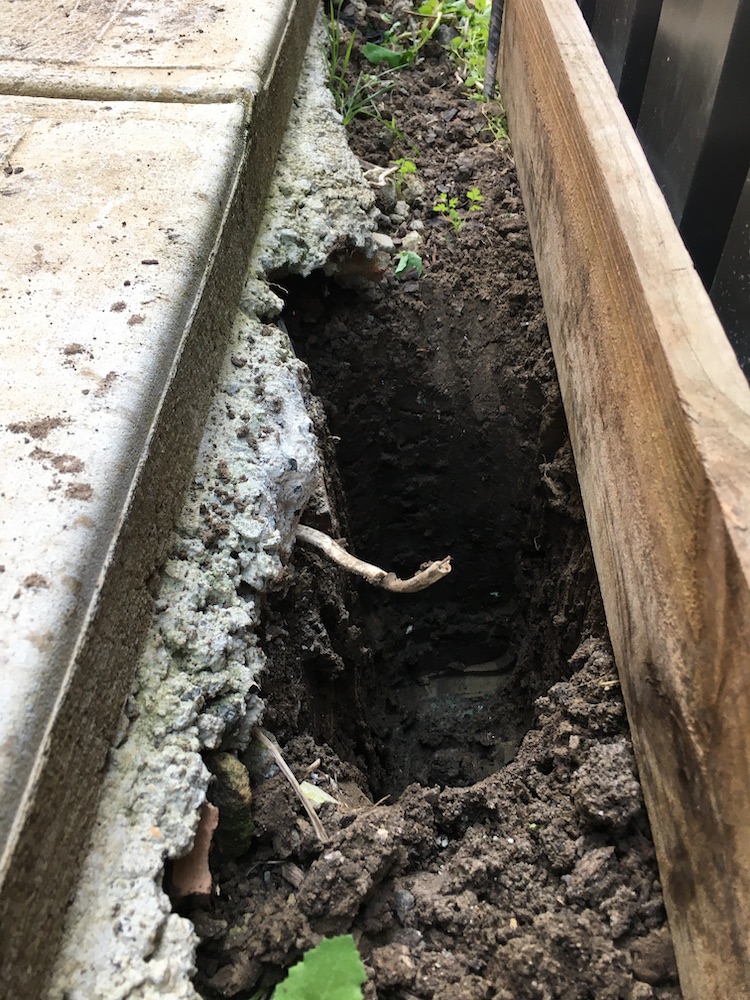
Notice that I put some planks. That’s because I wanted the concrete to sit a bit higher from the ground.
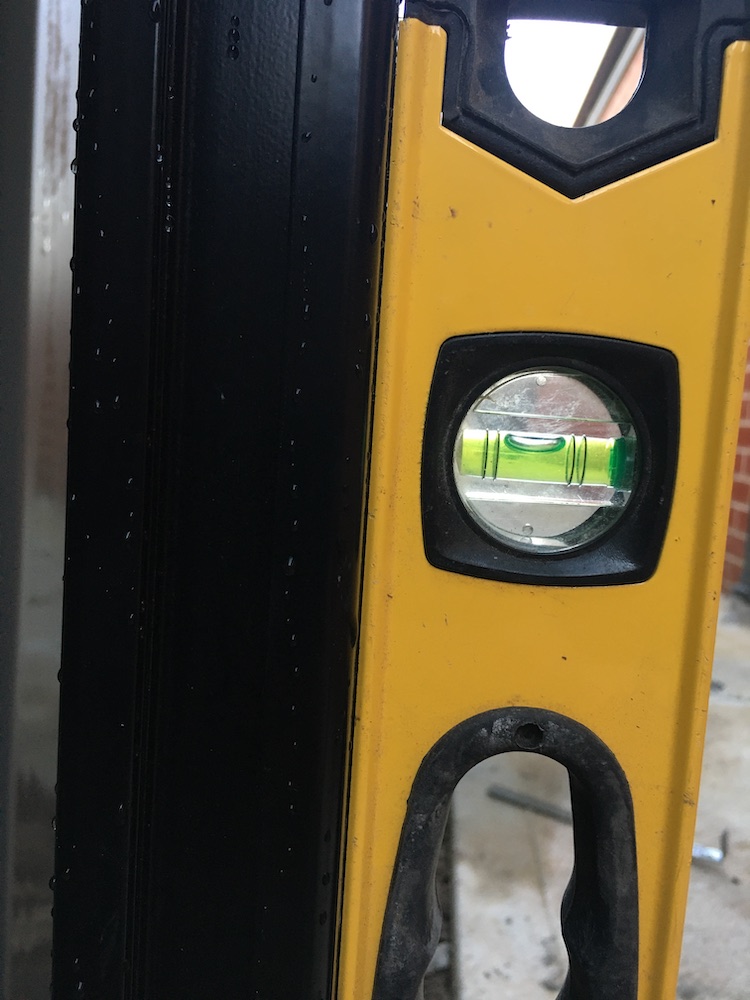
Pour concrete into the hole and mount the anchor plate. Using a spirit level on two sides, check that the bar is standing straight up.
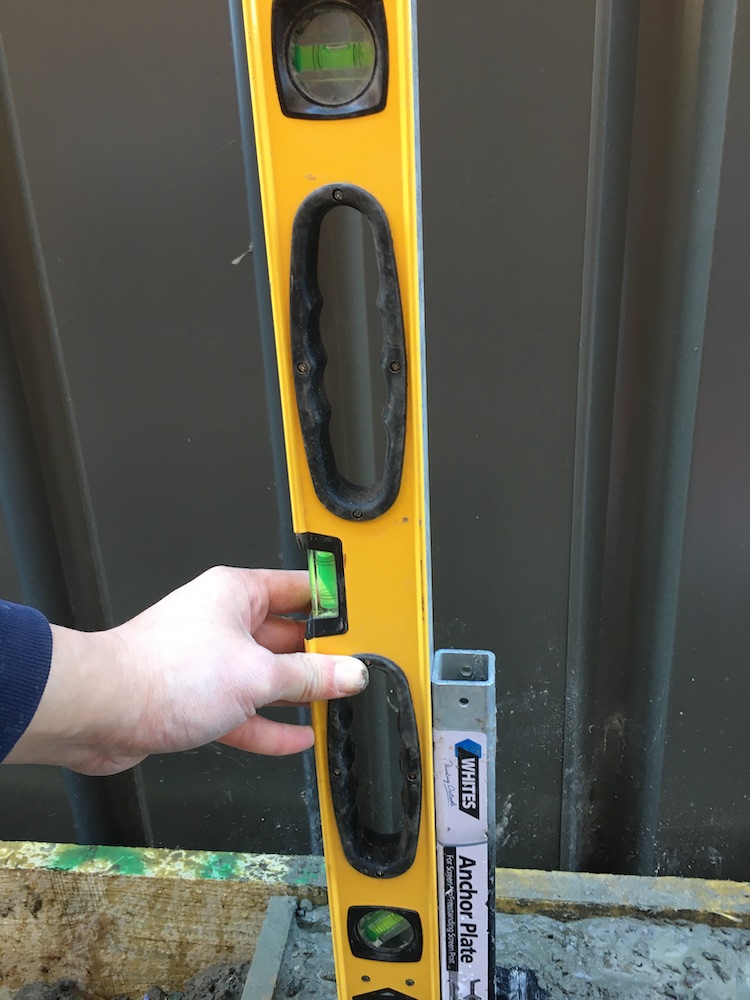
Let it sit and wait for about an hour. I actually waited overnight before proceeding to the next steps. The fast setting concrete is supposed to settle in about an hour, but I wanted to be sure. I like overkills.
Mount one of the Screen Up posts and secure it with the screws provided. The anchor plates come with 2 screws each.
Note:
That’s about it for the first post. Putting up the 2nd post is a bit more tricky as we have to consider a few things:
- We need to get the right distance – a few mm too close and the timbers won’t fit, a few mm too far and the timbers won’t sit on the spacers.
- The anchor plate should be levelled with the first one so that timbers can be stacked perfectly.
There are different ways to approach this but this is how I did it. Refer to the following steps.
Pour concrete into the 2nd post hole and put on the anchor plate at approximately 2.25m from the first post.
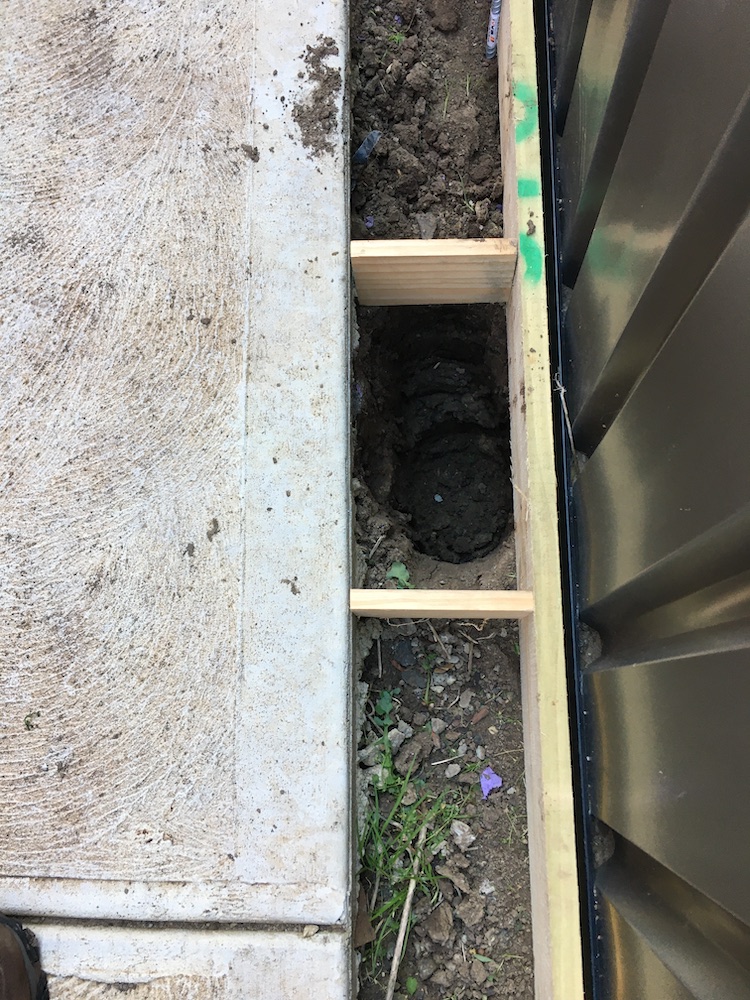
Establish the right distance – at this point, the distance will be a few millimeters off, give or take. Tweak it by using one of the timber boards.
First, insert one 10mm spacer (there are 2 included in each Screen Up post) in the standing post. This is where your first timber will sit on, 10mm above ground.
Then slide in the timber, make sure it’s flush and sits perfectly on the 10mm spacer.
On the other end, give at least 2mm distance between the timber and the anchor. This will leave enough space for the post when you slide it in.
Wait for about 20 minutes. We don’t want the concrete to get completely hard, we still need to do a few more tweaks.
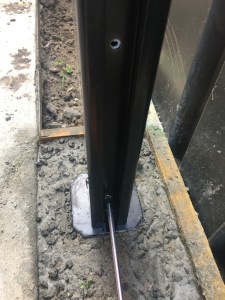
Put on the post. Just slide it GENTLY on the anchor plate’s upright bar.
Check the following:
- The timber is flush on both ends but not tight.
- The timber is levelled perfectly.
I used a rubber mallet to tap the post gently for fine adjustments.
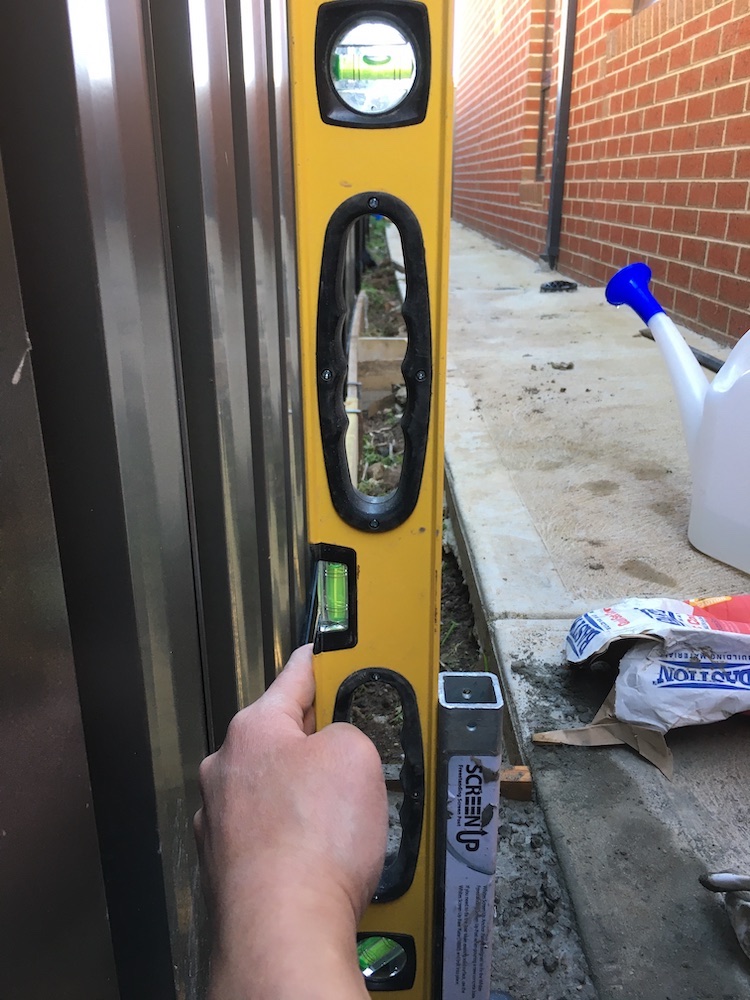
Use the spirit level on 2 sides of the post to make sure the post is standing straight up.
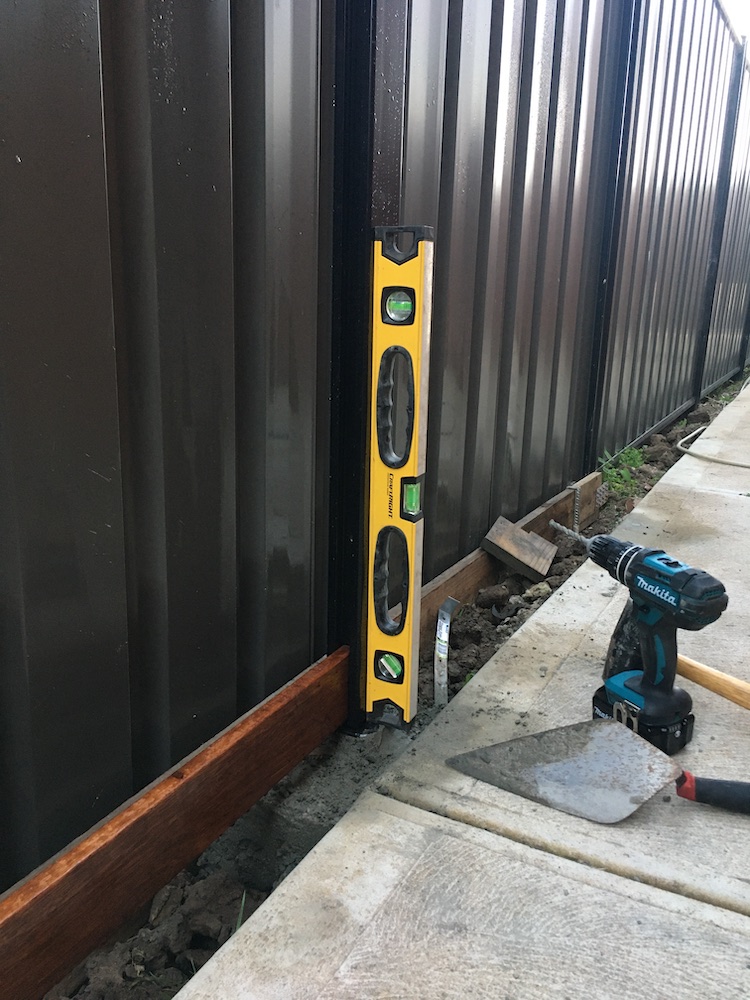
This is the part where I waited overnight again. You may not really need to wait that long but I did not want to take my chances. Again, fast setting concretes should be fine by about an hour so it’s up to you.
The good news is, we’ve done the hardest part. Hurray!
Here comes the fun part.
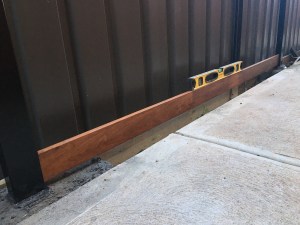
You already have one board in, now put in 1 spacer in each post.
Then slide a timber in, let it sit on top of the spacers on each post.
Repeat the spacer-timber pattern until the 18th board.
It’s literally easier than Legos!
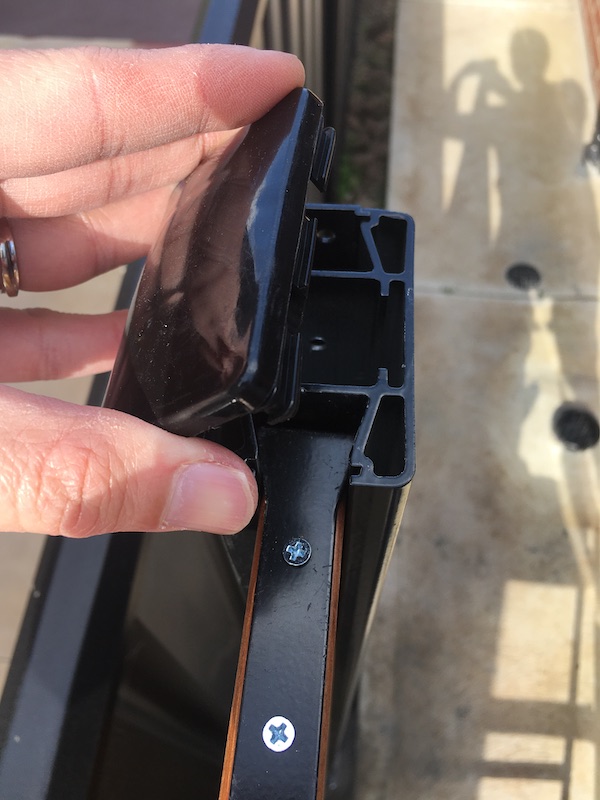
Secure the top-most timber using the provided locks (included in the Screen Up posts).
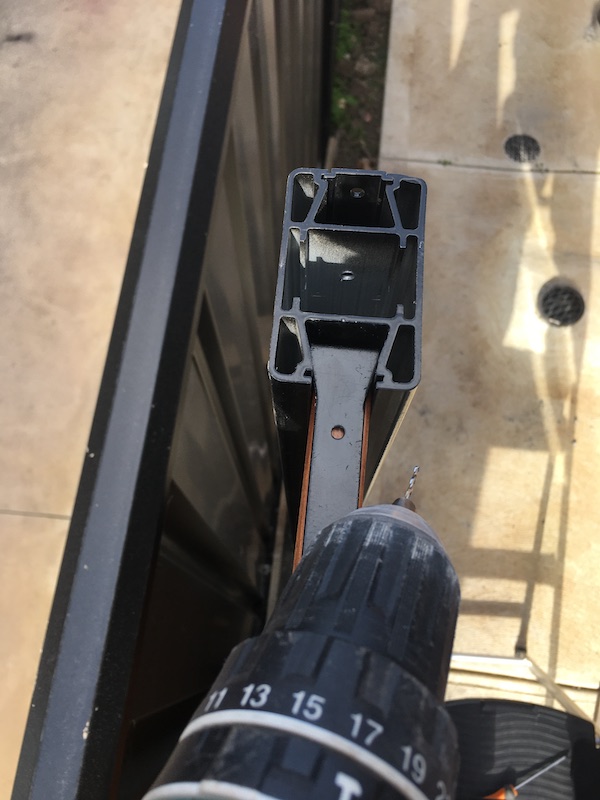
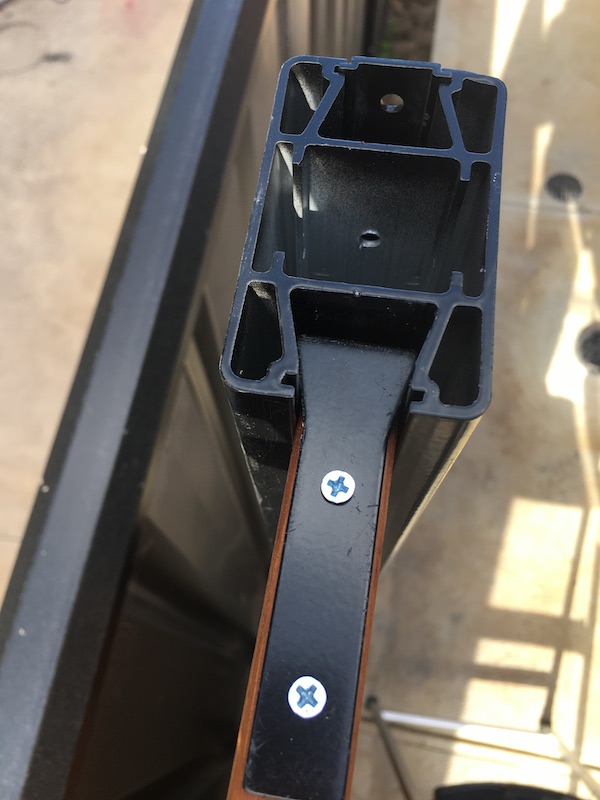
Put the caps in place.
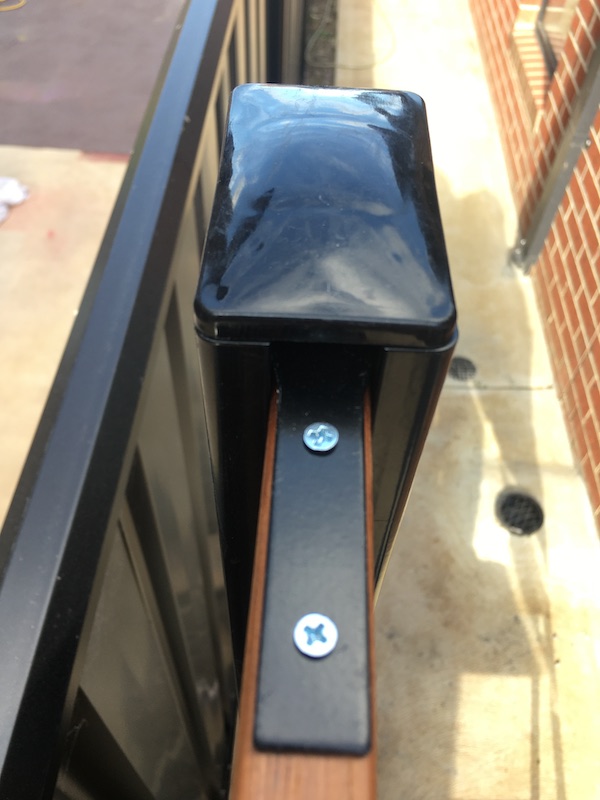
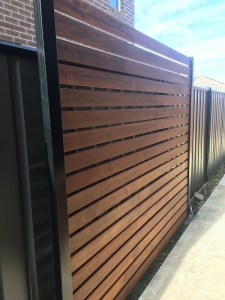
Beautiful!
Done.
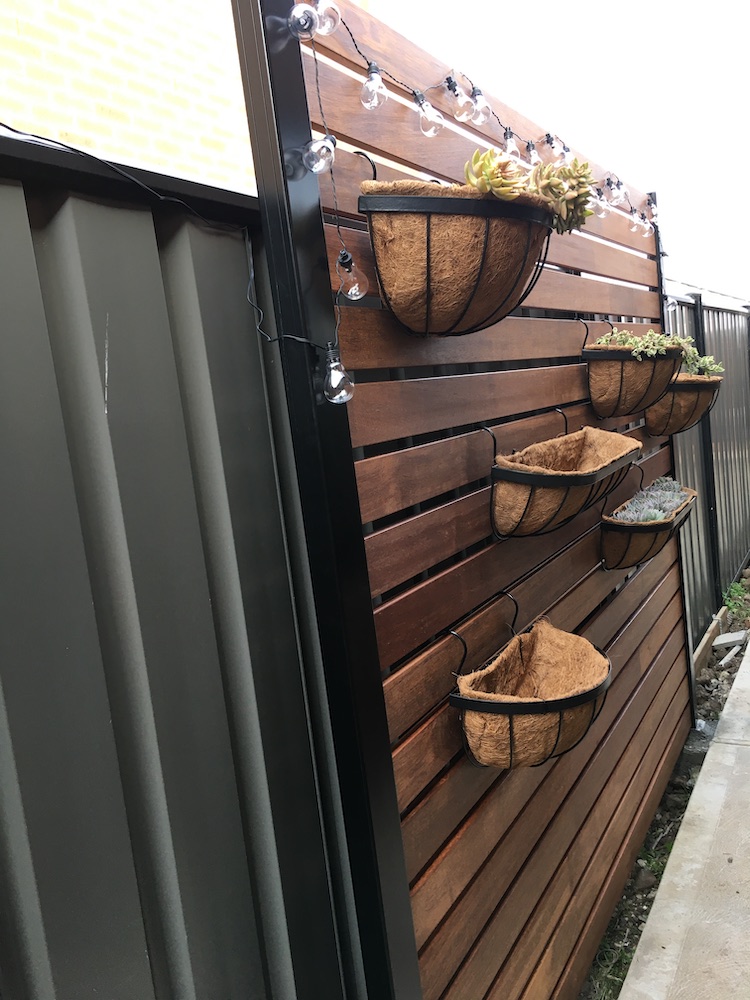
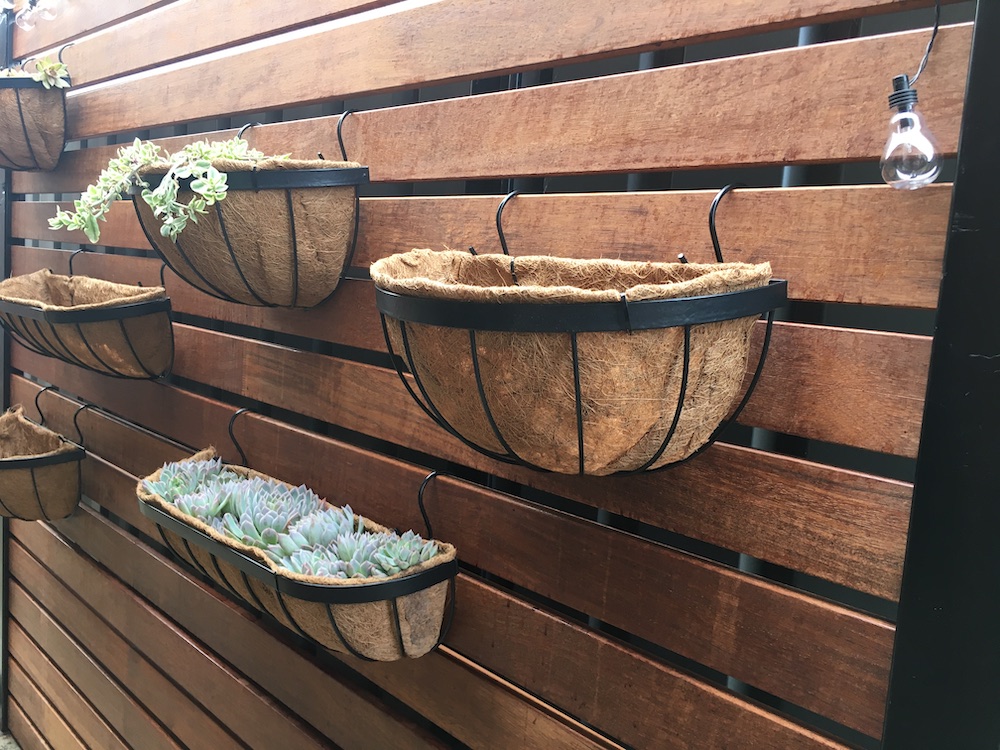
Finishing Touches
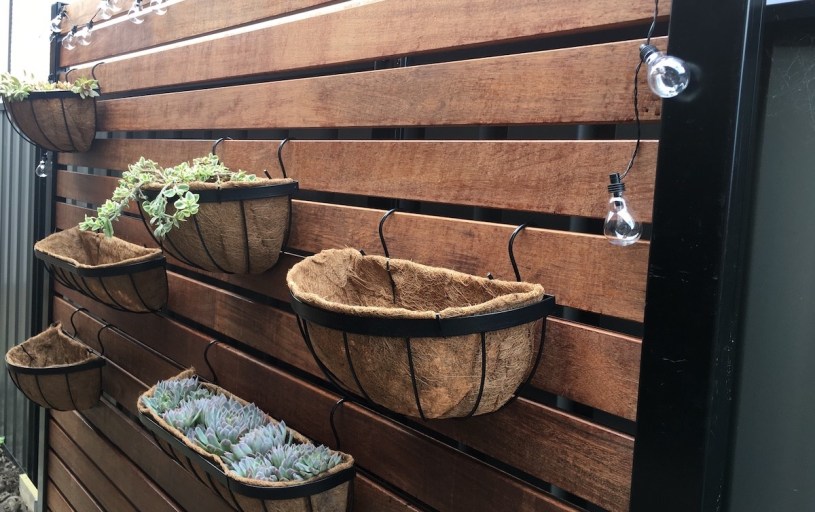
As far as screening goes, you are all set. However, you may want to add some stuff to make it look more pleasant and lively. So the missus put on some pots and plants. The process is pretty straight forward, no tutorials needed.
Here’s the final product:

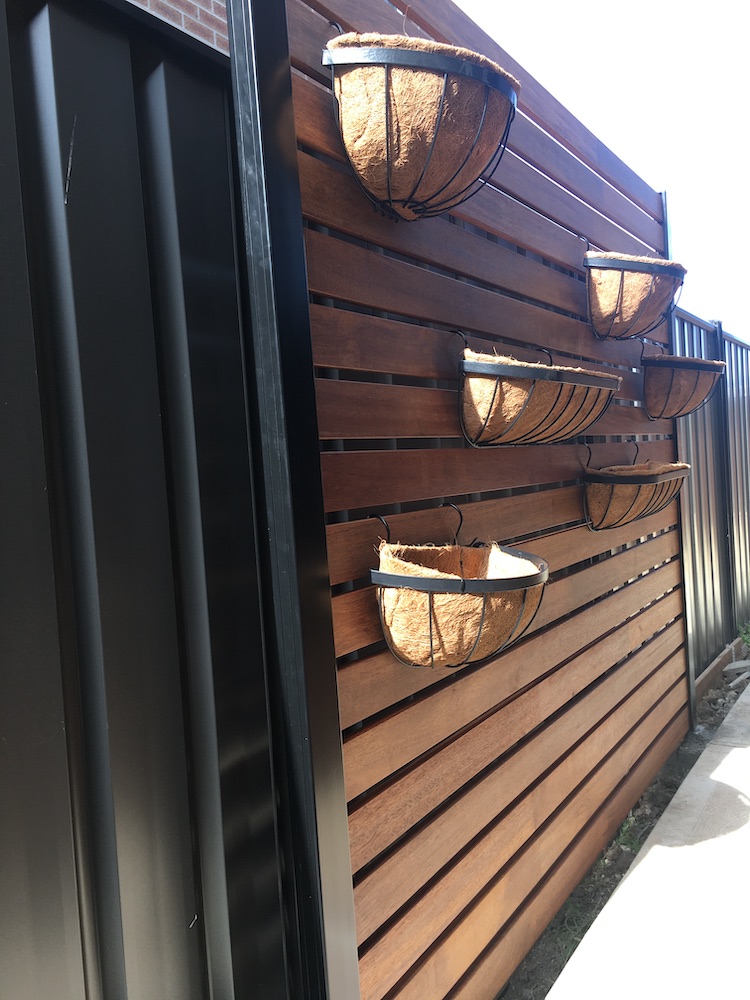
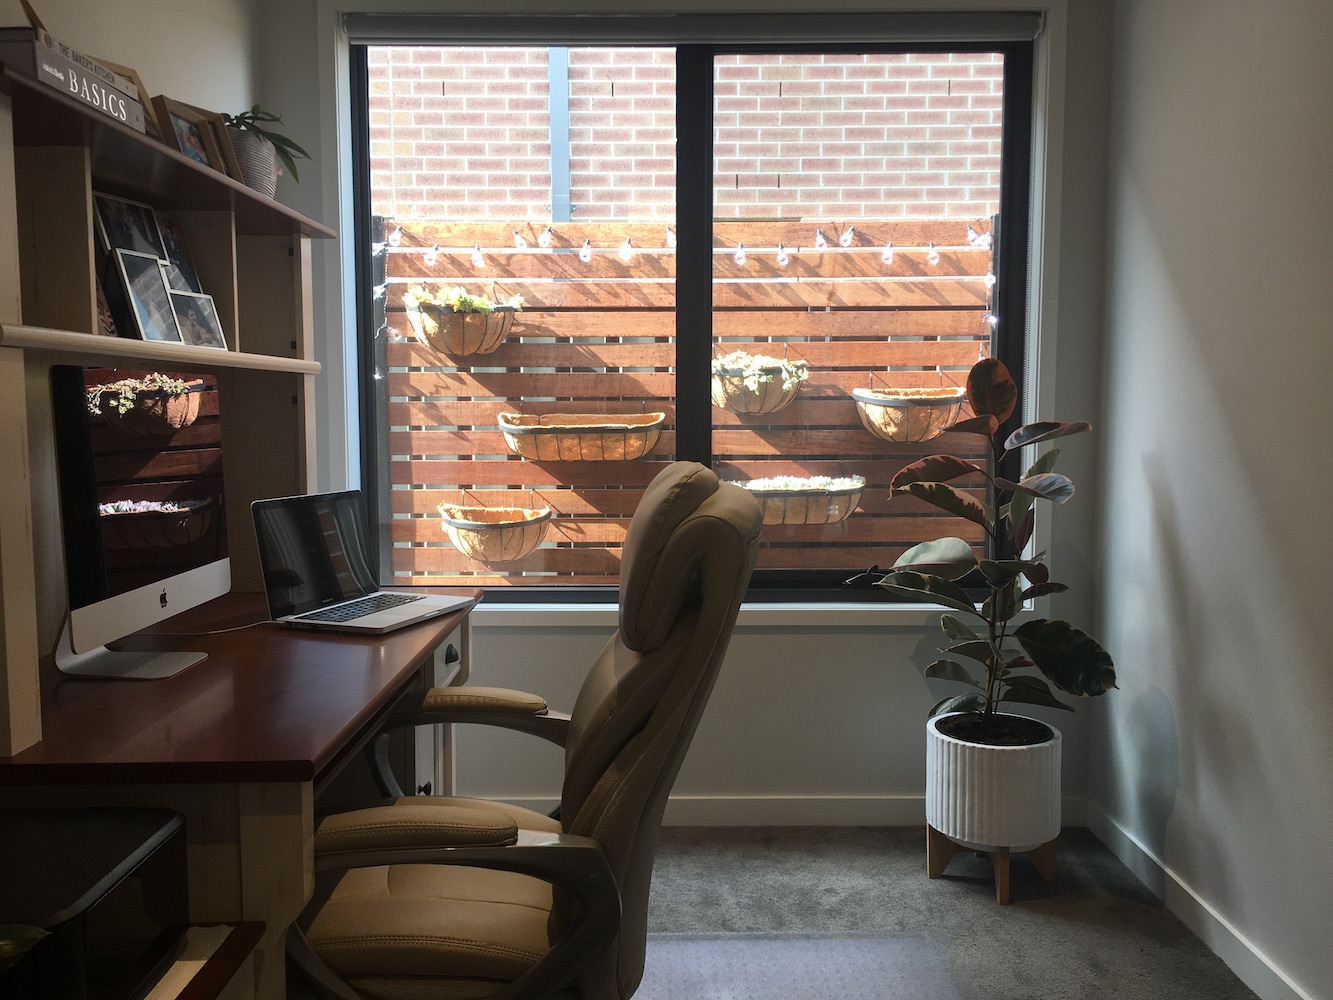
Now grab a beer, look outside your window, give yourself a pat on the back and take time to appreciate your handy work.

Great work. Stay safe.
LikeLike
Thank you. You too!
LikeLiked by 1 person
Thanks so much for the detailed instructions, photos and links to the products.
I’m planning to construct this outside my patio but I’m a bit of a novice. I have about the same distance between pavers and fence as you have and I’m trying to work out how to dig the holes. Is there an easy solution?
Thanks.
LikeLike
Hi Tina, apologies for the very late response. Hoping you figured it out. If not and you still need some info, let me know and I can probably help with some ideas. Cheers!
LikeLike