I installed a DIY shade sail in my narrow backyard to create a usable outdoor seating area for BBQs and gatherings.
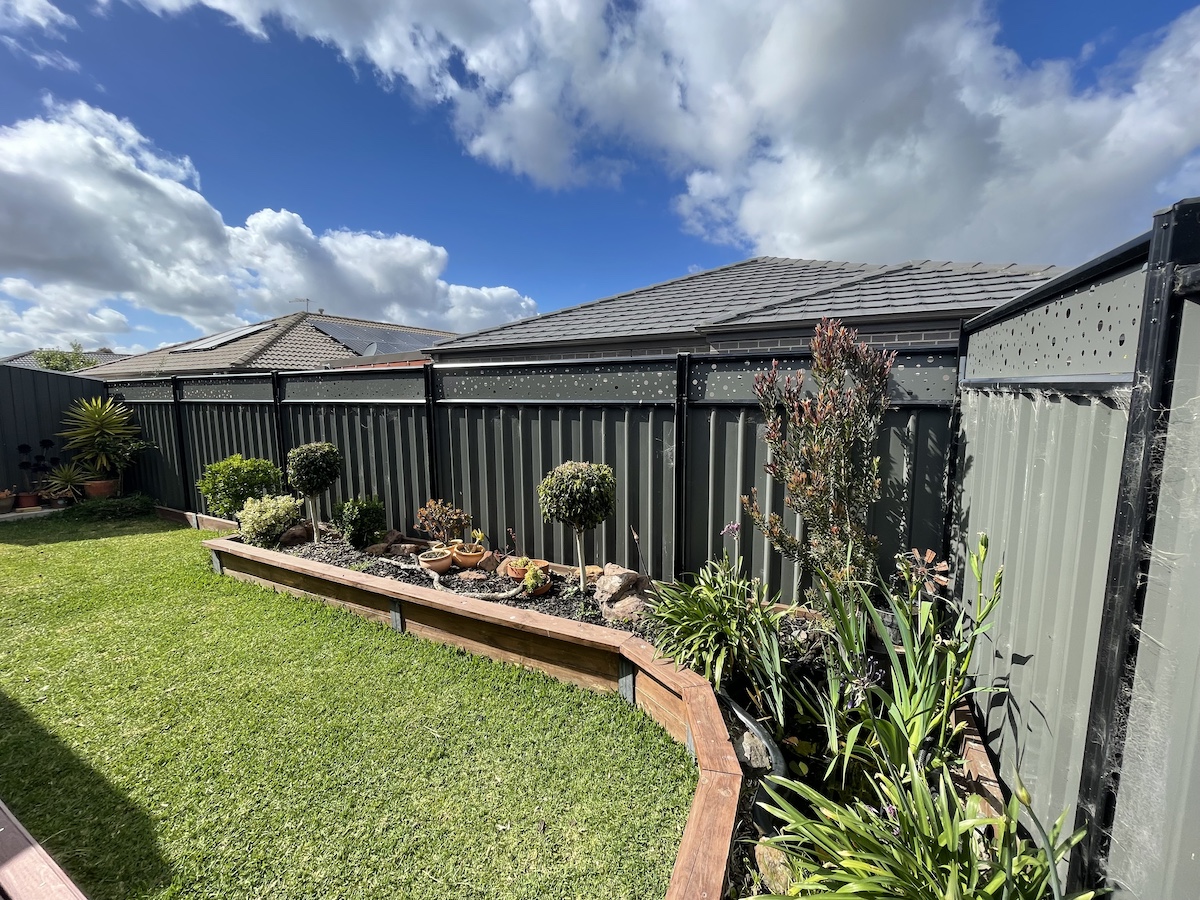
My backyard is only 12.5m × 4m. Over time I had already built several projects including Colorbond fence extensions, a retaining wall with planter box, and a small pond.
The planter box was designed with a ledge so people could sit there when needed. That was the plan at least.
But the reality was different. During parties and small gatherings, nobody really sat there. Something was missing. Yes, it had a sturdy timber planter bench, but it didn’t feel like a proper space. It wasn’t inviting. It lacked that cozy feeling that usually comes with a covered area.
As my wife’s 40th birthday was fast approaching, I had to move quickly. We needed that area to work for the party. I had to find a way to make people actually use the space instead of everyone clumping together on the living room sofa.
After weeks of exploring options, I eventually settled on installing a shade sail.
Why Install a Shade Sail
There are plenty of options when it comes to creating shade in your backyard. If you’re wondering why I chose a shade sail, here are a few reasons:
- ideal solution for small backyards
- provides sun protection
- cheaper than pergolas
- easier than building a roof structure
In short, it’s a very DIY-able weekend project.
Project Summary
- Project: DIY Shade Sail Installation
- Backyard size: 12.5m × 4m
- Sail size: 3 m × 3 m
- Posts used: 88 × 88 × 3m timber posts
- Installation time: 1 day
- Difficulty: Moderate DIY
- Estimated cost: ~$200–$300 AUD
The Plan
The sail has four corners, each requiring an anchor point.
One side will be anchored to my brick wall and the opposite side will have to be anchored on two timber posts near the fence line.
In summary, (or at a high-level, as we like to call it in IT), here are the main tasks involved:
- Determine anchor point positions.
- Erect two timber posts.
- Attach two anchor points on the brick wall.
- Attach an anchor point on each timber post
- Attach the sail.
Materials
Timber Posts
I used two 88x88mm x 3m posts. It works ,but trust me if you can go bigger, say 100×100, then go for it. The sail needs tension and if you consider wind conditions on bad days, then the bigger post size will give you some peace of mind.
In terms of the 3m length, it’s because our standard fence height is two meters high. I will bury at least 500-600mm which will leave me with 2400mm – 2500mm — that’s a little over the fence which is what I intend.
Sail
At first I opted for 4m x 3m sail from Bunnings. My backyard has a narrow rectangular shape so this should cover the most ground.
Once the item came in, it looked a little too big in relation to my alfresco. I swapped it with a 3m x 3m sail.
Pad Eye
Pad eyes are the anchor points on the brick wall. I got two of these
Masonry Screws
This is for mounting the pad eyes to the brick wall. You will need at least eight as one pad eye has four holes.
Eye Bolt
M10 Stainless steel eye bolt or through bolt. This is the anchor points on the timber posts. I got two – one for each post.
D Shackles
This for connecting the sail with the anchorpoints. I got 12 small D shackles. You can get away with less if you choose hooks for your turnbuckles or anchor points. But I think connecting them with D shackles is the best way to ensure your sail isn’t going anywhere even under strong gusts of wind.
Turnbuckles (eye-eye)
This is also part of the anchor point connection. I recommend eyes on both ends as opposed to hooks–that’s what the eye-eye means. That’s the reason why we needed quite a lot of D shackles.
Turnbuckles make it easy to tighten or loosen the sail’s tension just by turning. I got four.
Chain
Chains are optional but could prove handy if your anchor points are too far apart. This is needed to extend each sail corner anchor.
Quick-setting Concrete
This is for securing the two timber posts. I had two bags.
Tools
Hand drill
A hand drill with hammer mode is needed to drill through the brick wall, and the timber posts. You will have to use masonry bits for the brick wall, and a long bit for the timber post.
Post Hole Digger
Needed for digging two holes for the timber posts.
Step-by-Step Guide
There’s a lot of tutorials out there, each with little variations but they are the same for the most part. Here’s how I did mine:
Step 1 – Mark the Anchor Points
Determining the anchor points on the brick wall.
I picked two points that are at least 3.6m apart. This is relative to the sail which is 3m long. Notice that I’m giving it + .6m allowance. This is to give the turnbuckles some space to create tension–to pull the sail in opposite directions.
I placed the pad eyes on position and marked a hole with a pencil. Just pick one of the four holes.
Determining the timber post positions.
The two anchor points will be on the timber posts.
For this, I just picked two spots near my fence line (opposite to my brick wall) that are directly aligned to the two anchor points in the brick wall. The four points are square, if you can imagine.
Step 2 – Dig Post Holes
Now that I know my post positions, I dug the holes using a post hole digger. Each hole is approximately 600mm deep for to ensure it’s stable and strong.
Step 3 – Install the Timber Posts
I positioned the timber post into the holes, braced it against the retaining wall next to it, an poured quick-setting concrete.
Here’s what the brace looks like:
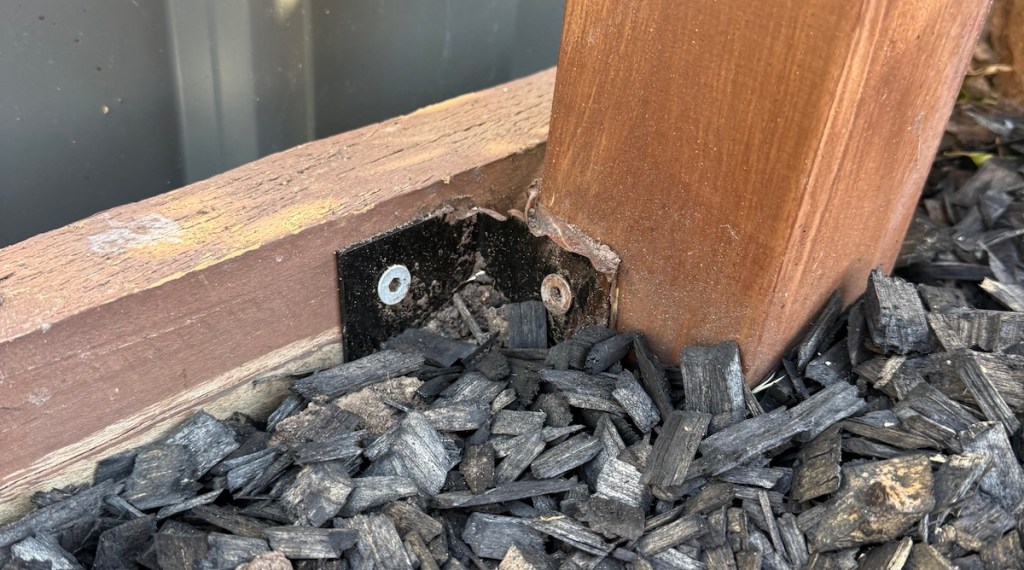
Bracing the timber to keep it perfectly upright while setting the concrete. I will leave it there to add some stability and support.
I did this for two posts.
While waiting for the concrete to settle, I went back to my brick wall to start installing the two anchor points
Step 4 – Install Wall Anchors
With my hand drill on hammer mode + masonry bit, I drilled the first hole for the pad eye. I mounted the pad eye with just one hole first and continued drilling through the bricks using the actual pad eye holes as guides. This is because masonry drills tend to slip at the start and the holes may not align as a result.
The process goes like this:
- Drill the first hole.
- Secure the pad eye with a masonry screw.
- Pick another pad eye hole and drill through it.
- Once the hole is done, put in the masonry screw
- Repeat until all four holes are secured.
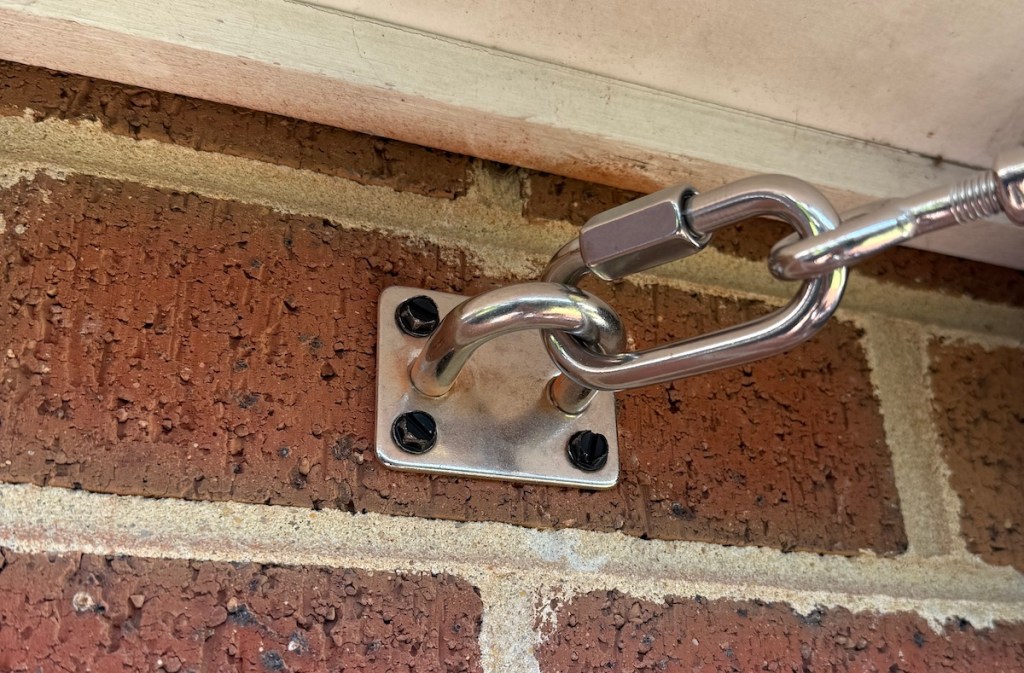
Here’s a fully mounted pad eye on a brick wall:
Step 5 – Install Post Eye Bolts
I marked a spot on the timber where it is slightly lower than the pad eye on the wall. This will give the sail a slope.
I drilled a hole through the timber using a 10mm drill bit. Make sure it goes through the other side of the timber.
Punched the through bolt in and secured it with a a nut on the other side. The nut and washers are included with the eye bolt.
Do the same for the other post.
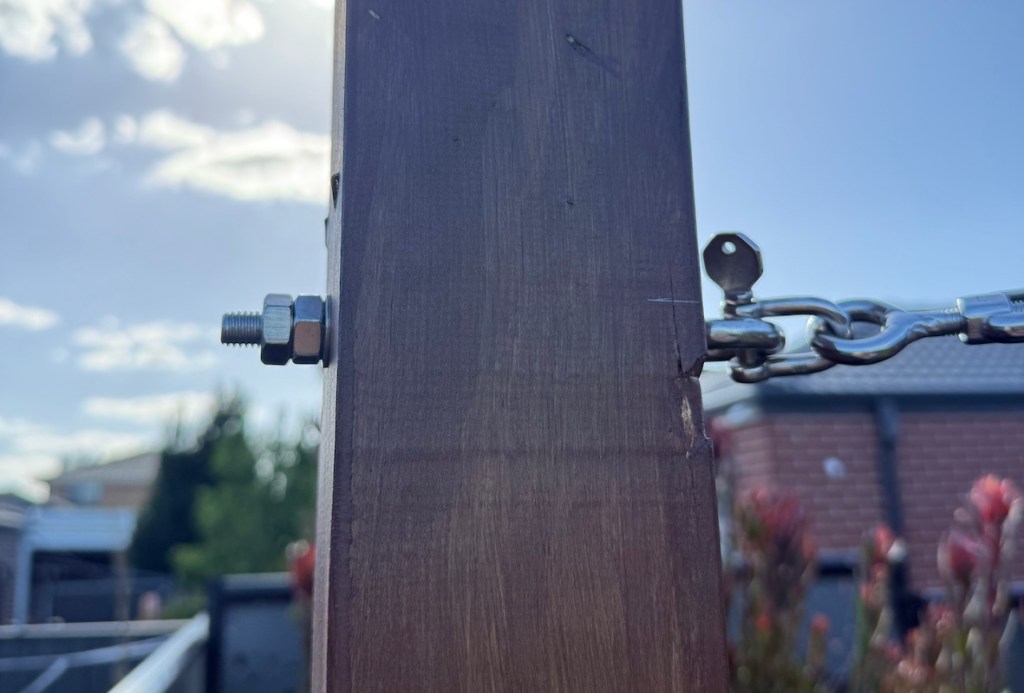
I don’t have a step-by-step photo but here is a finished one to give you an idea of what I meant by “it should got through the timber”.
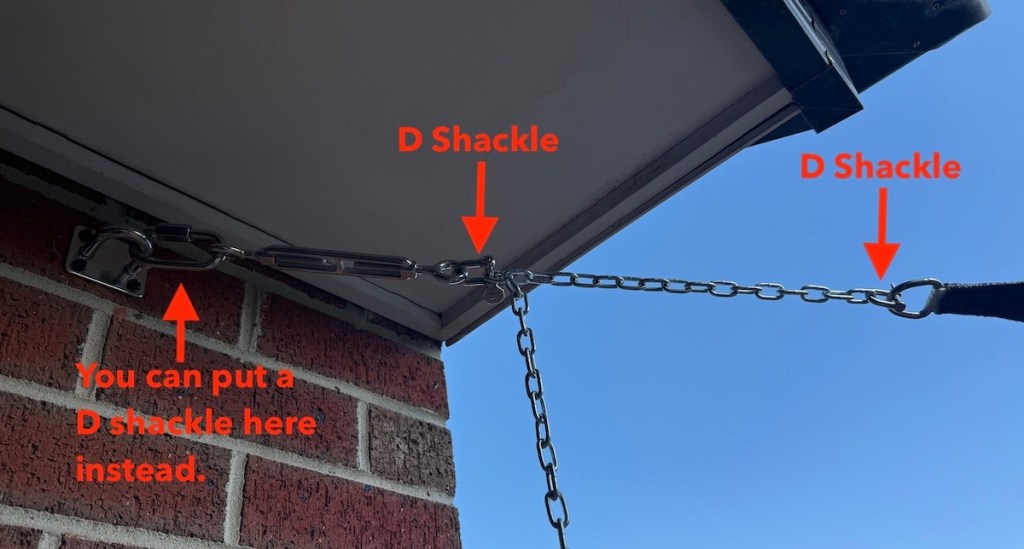
Step 6 – Attach the Shade Sail
We are finally at the fun and easy part. The idea is to connect each corner of the sail on to the anchors.
- First, I loosened the turnbuckles to its maximum length.
- Using a D-shackle I secured one end onto the pad eye.
- Using a D-shackle, I connected the other end of the turnbuckle to a chain.
- Using a D-shackle, I connected the other end of the chain onto the sail’s corner eye.
I repeated the process for the other 3 sail corners,
All four corners are connected in the same way, so here is the connection pattern:
Once everything was in place, I tightened the sail by making small adjustments on the four turnbuckles until I get my desired tension based on visible sag and the chain tension.
And that’s pretty much all you need for a sail shade. Before I show you the finished product, let me give you a few handy tips.
Handy Tips for a DIY Sail Shade
The timber posts that I used (88 x 88) should be the bare minimum. I would even recommend 100 x 100. That is because, you will need good tension to get a flat good looking sail.
Use a spirit level on the posts before bracing and pouring concrete to make sure it’s standing straight up.
Stain the timber post and finish with a protective varnish to help the timber last longer under the elements.
Masonry drill bits brand matters. I used Craftright and it took me ages to finish a single hole. I bought a slightly more expensive brand and it just chewed through the bricks like wood.
When you can, avoid using chains. I only used it because the anchor points are too far away for my turnbuckles to reach.
Add some decors. I threw in some optional solar lights for aesthetics.
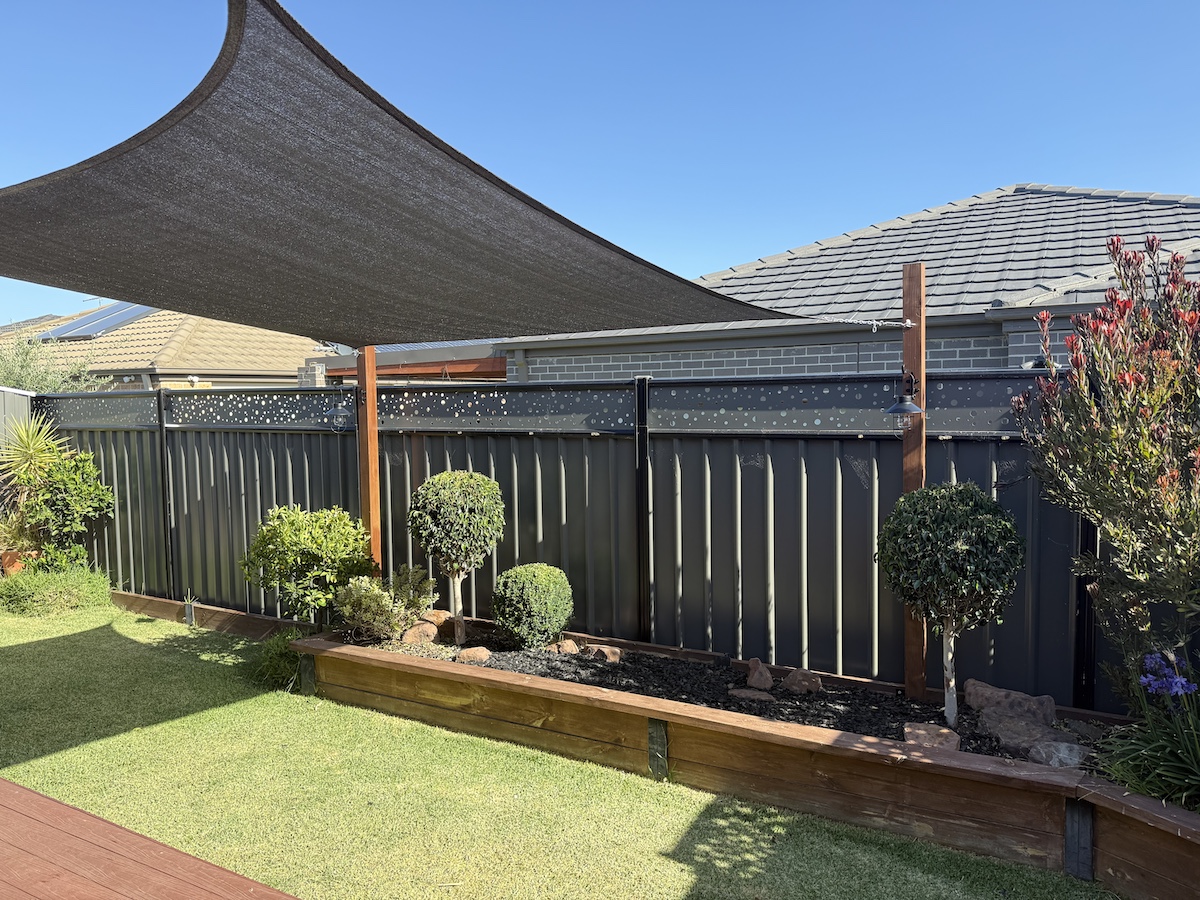
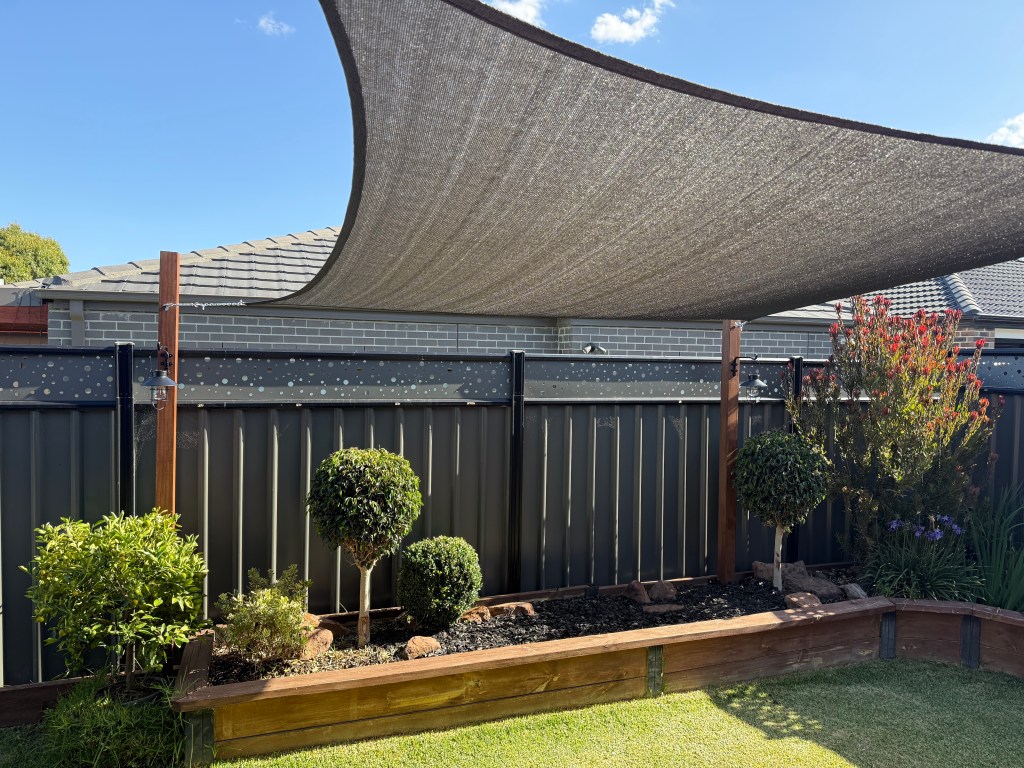
Photos
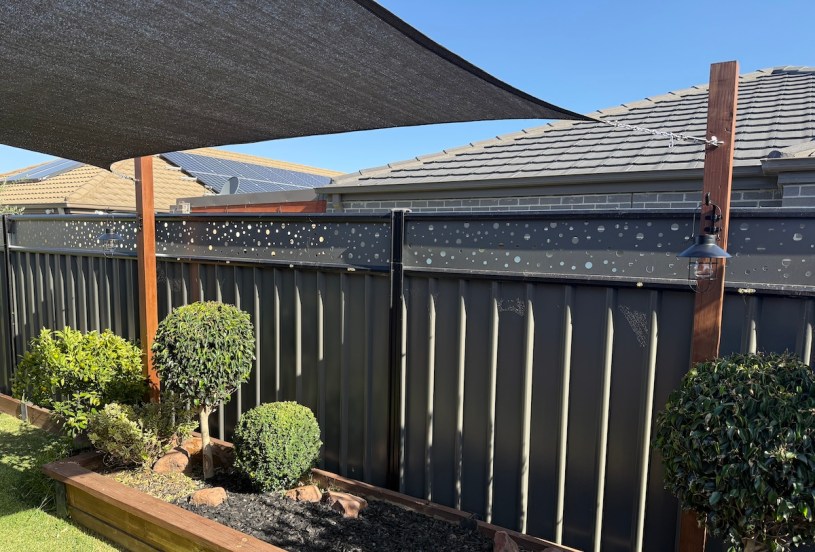
Here’s what my new sail shade looks like at daytime.
And here’s what it looks like at night with the solar lighting.
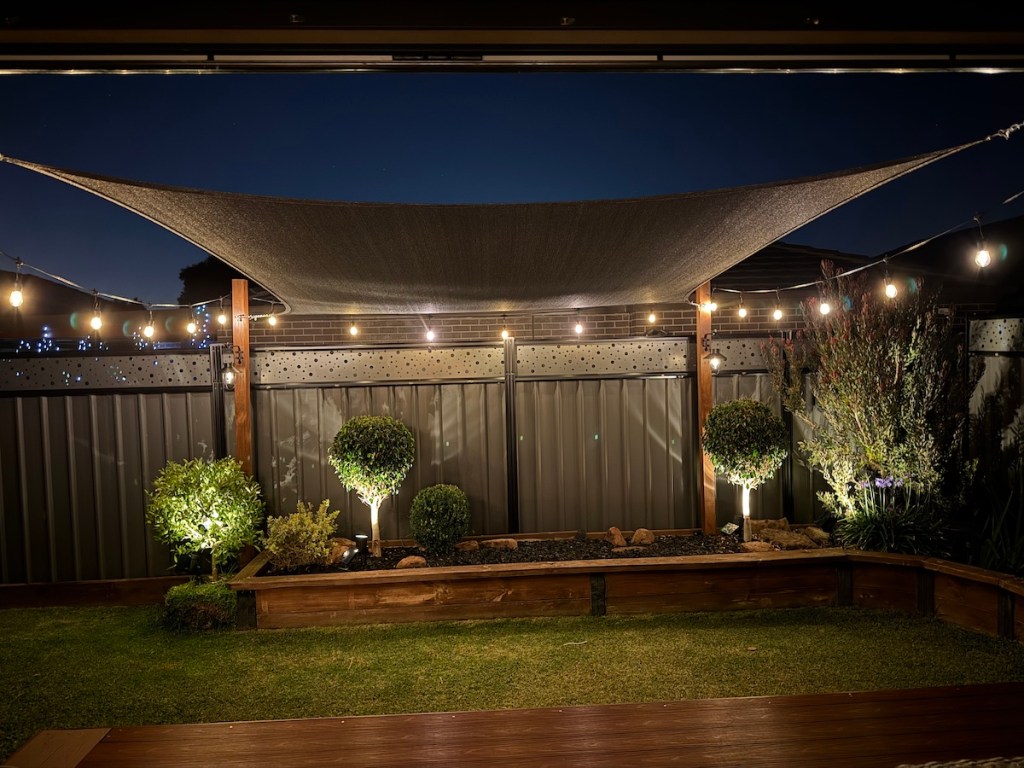
Conclusion
In the beginning I mentioned about the problems that this sail should or hopefully solve. I wonder if people will actually get to hangout in here now that it has a little bit of that cozy feel of a covered space.
On my wife’s birthday celebration, that question got answered. It was a convincing yes.
True that the house was packed, but my DIY bench/planter box isn’t the last option this time around.
Food, drinks, some acoustic 90s jam sessions and laughter all within the once neglected space.
This project was a big win.
However, I should mention that it had one of those perfect 25 degree Melbourne weather – very rare especially at night. We also had a blackout which is a relatively rare thing in Australia as well. Safe to say, the circumstances did help it a bit.
Safe to say, it was a night when the festoon lights aligned.
