
Having security cameras has become a standard in every household these days. We’ve been living in our home for a little over eight years now but it wasn’t until a year ago when I put up a doorbell cam at the front door and a wireless cam at the alfresco. Both are wireless, battery powered units. At the time we were set to go overseas and I needed something that I can quickly put up myself without breaking the bank so I opted for the Ring wireless tech. They’re good, they do the job, but I always thought of them as band-aid solutions because a fully wired system was still in my to-do list. But here we are, procrastination is winning again.
The thing about procrastination is, at some point, certain circumstances will push you to just pull the trigger. In this case, some rogue Coles trolleys. I managed to get some footage from my next door neighbour (in the last part of the blog). To be honest I was fuming at first because I felt disrespected in a way, for not having a security cam. But then the next day, they struck again – at one of our neighbours strip this time. He was just as disappointed as I was so he gave me the footage – can’t make out the faces but it’s better than nothing.
Anyway, I was still lucky that it was just a bunch of cheeky kids/teens. What if it’s someone randomly picking houses to break in? Then the house with no cams is an easy target.
Here are the stills from our neighbour’s cam. I will not show the other one where it was the mom who dropped the trolley off. Shaming is not the intent in this blog.

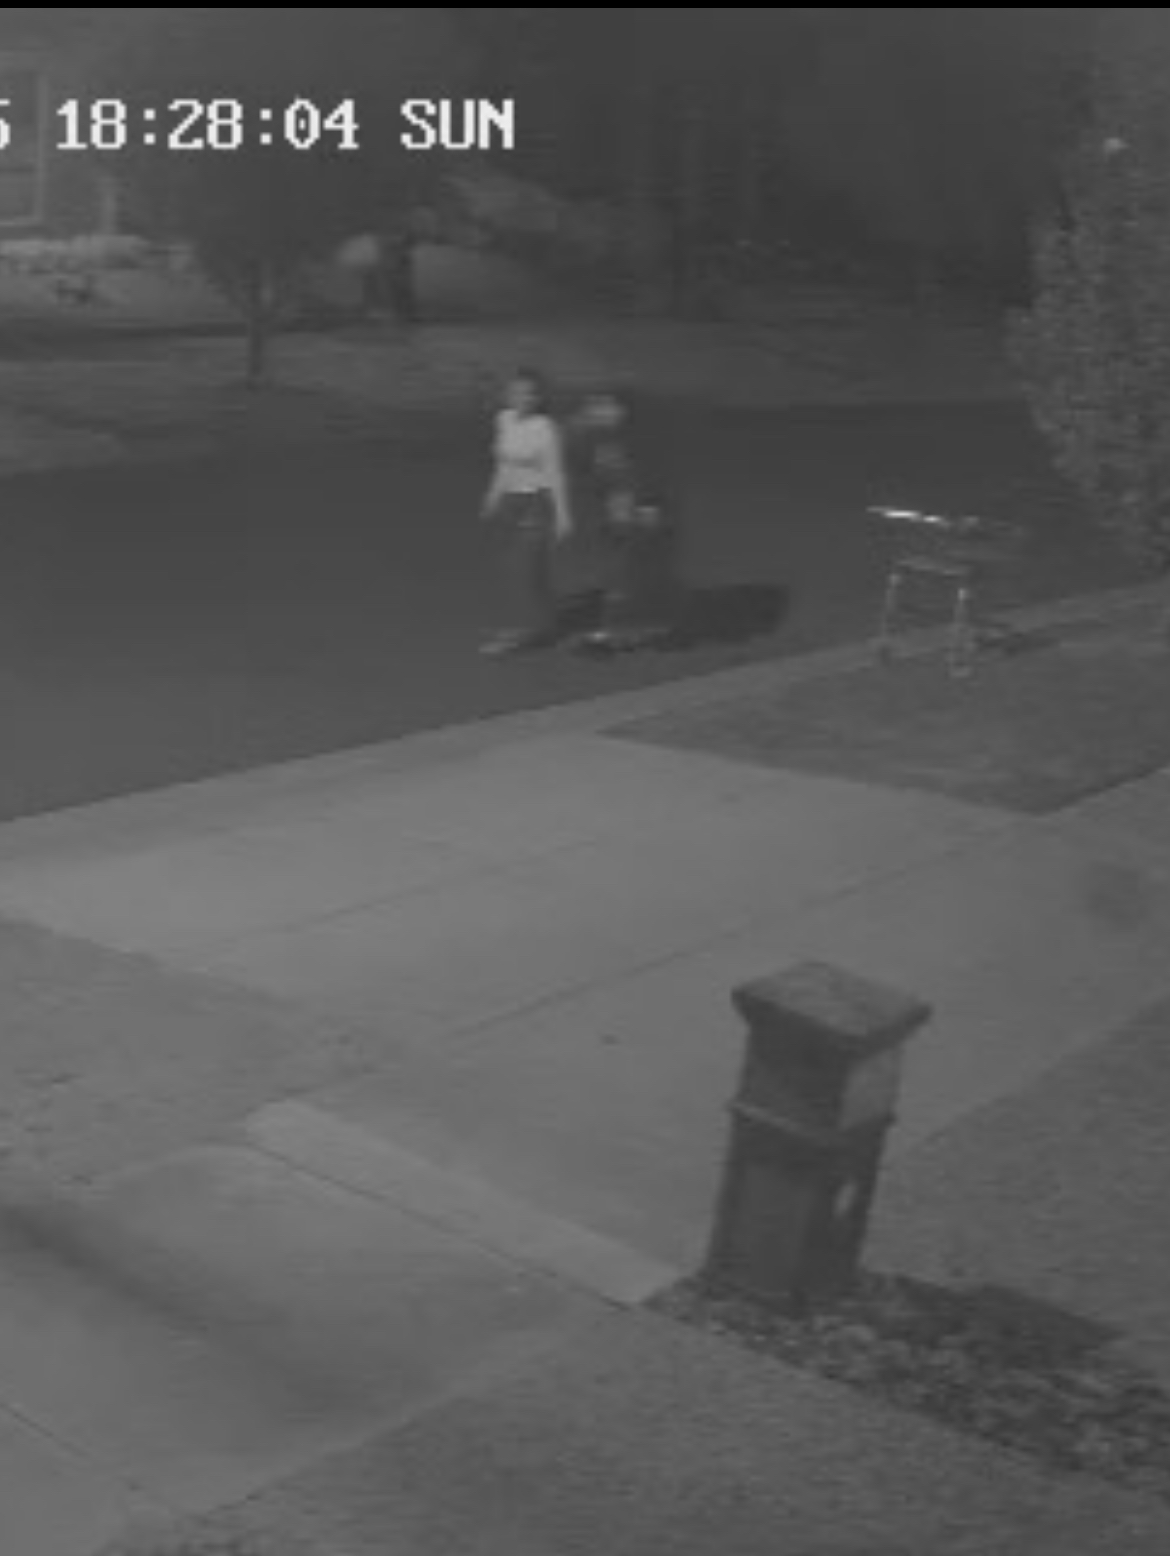
They’re lucky I’m no CSI Miami agent. I would have zoomed in on the trolley’s handle a gazillion times and the finger prints would be good enough for forensic evidence.
That said, I need another Ring wireless cam that I can install in minutes!
Why Ring?
If you don’t know it yet, Ring has a subscription plan which allows you to view captured footages. Without a subscription, you can still use your cams for live views but you can’t look at past events – a little useless when in cases like “how did this trolley get here?”
So why Ring? Since I already have two, which I considered band-aid solutions, I might as well add one more. The monthly subscription will allow for unlimited number of cameras (at the time of this writing) so I will only have to spend for a new unit. It’s still the quickest and most affordable solution for me.
This blog will not cover a deep dive into setup and installation because it’s really too easy. With setup, Ring has a very intuitive guide so just go for that one.
What this blog offers is one of the ways of mounting the cam, what are the additional items I had to add and a quick how-to section.
Let’s jump in.
What You Need
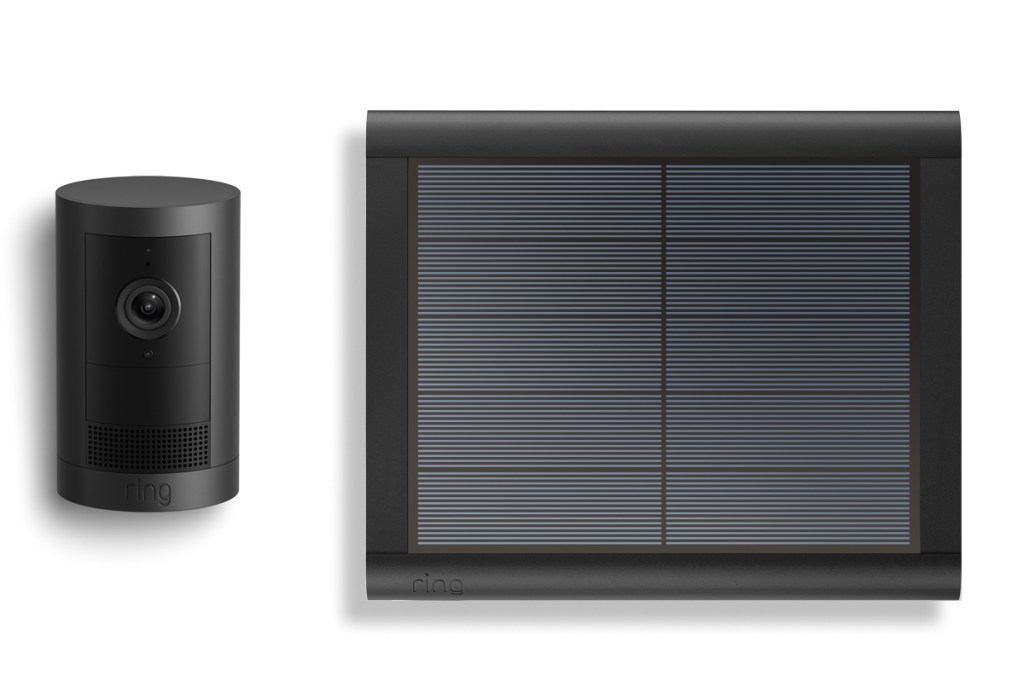
Ring Camera – first on the list of course is the camera. I got the Ring Outdoor Camera Plus Solar (Featuring 2K Video with Ring Vision) – it comes with screws and solar mounts so you won’t really need anything else, it’s ready to go. Unless if like me, you want to do it in a slightly different way, then the included mounts won’t work. Here’s the product link.
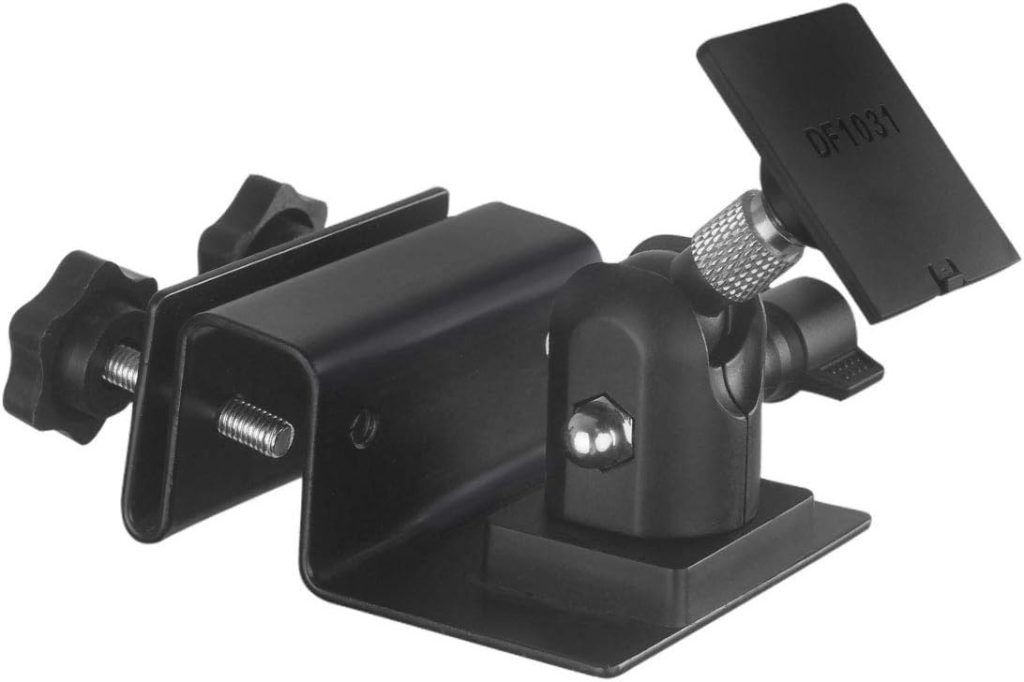
Gutter mount – this is for mounting the solar panel to the gutter. Ring does have their own solar mount but it’s more expensive (they say you get what you pay for) but I found something in Amazon that I think is more suitable for my plan – check out this link.
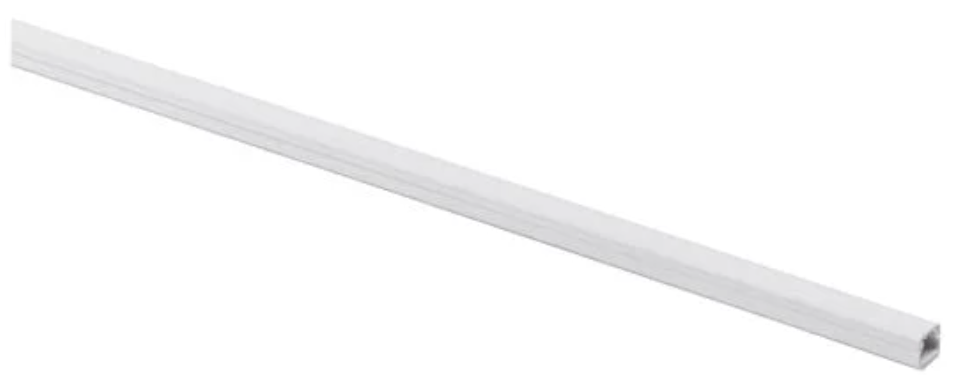
Cable Management Cover – of course we gotta do a bit of cable management just keep things as tidy as we can. Here’s something from Bunnings. There’s a few different types but anything will work. The purpose of this is to hide the cable that connects the solar panel and the camera. Here’s the link.
Not So Step-by-Step Installation Guide
Before you do this, make sure to set up the cam with your wifi network and app. Again, that’s a straightforward process, the app will walk you through it.
Now that the cam is working, time to mount/install it.
Step 1: Reposition the camera’s mount to the back – this will allow you to mount it on the ceiling.
Step 2: Using a drill, screw the unit’s mounting plate. Steps 1 and 2 can be found in the Ring app so check that one out.
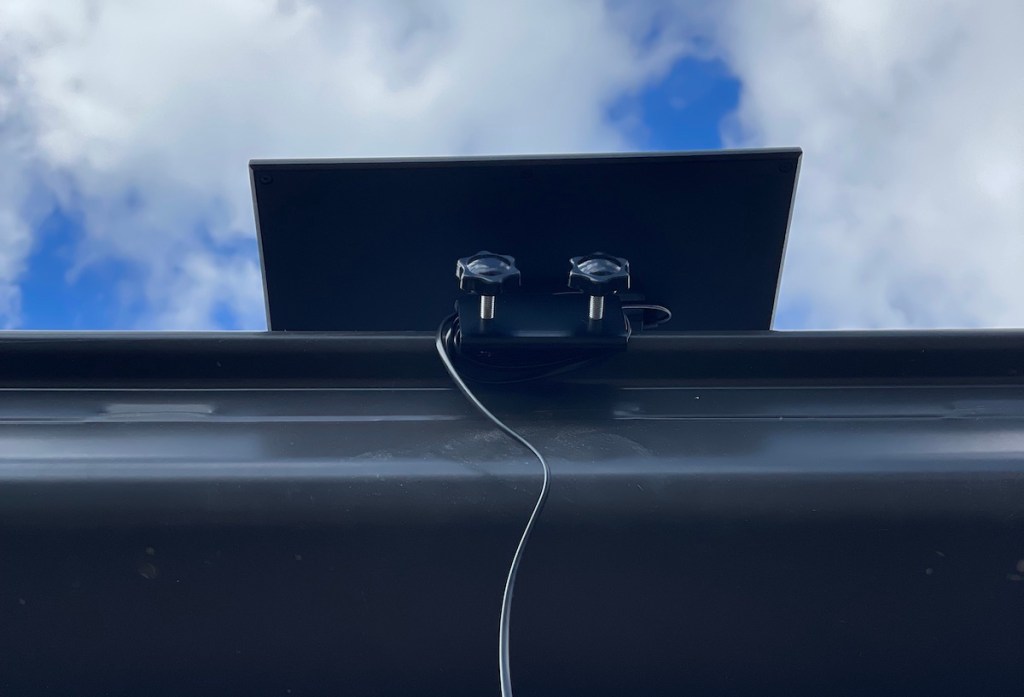
Step 3: Attach the solar panel to the Holaca gutter mount (don’t use the included mounting bracket).
Step 4: Mount the Holaca gutter mount into the gutter.
Step 5: Measure the cable management cover based on your layout and cut accordingly. Peel the sticker and stick onto the eaves. Open the cover, in goes the cable, snap the cover back on.
Step 6: Connect the other end of the solar cable to the camera and you’re done. Well, using the Ring app on your phone, view it and adjust the angle. Once you’re happy with it, it’s done for real.
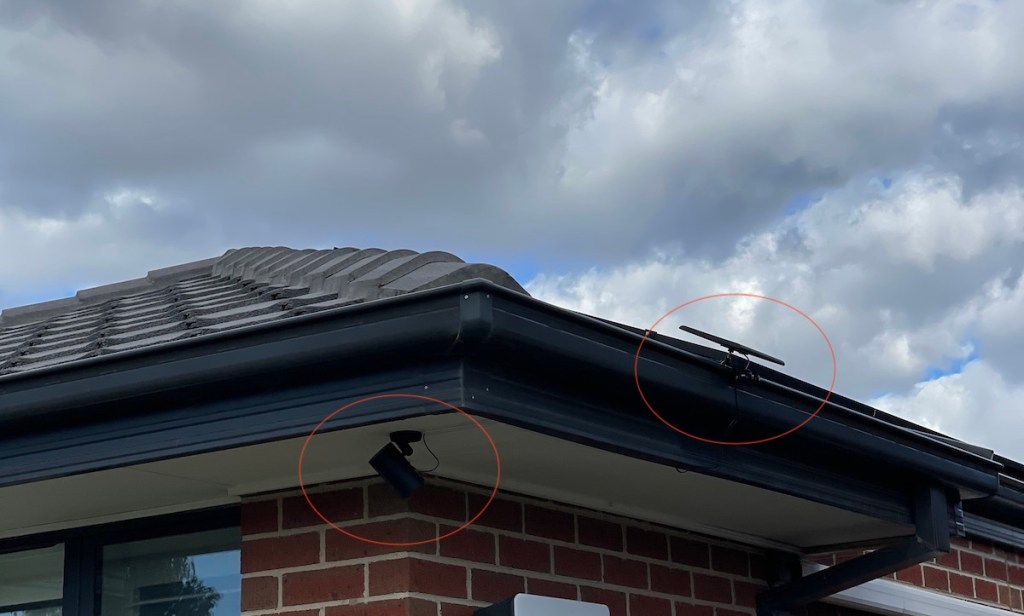
With all the work we’ve done so far, here’s what it looks like. The cable management cover is keeping the cable from dangling at least – looks decent in my humble opinion.
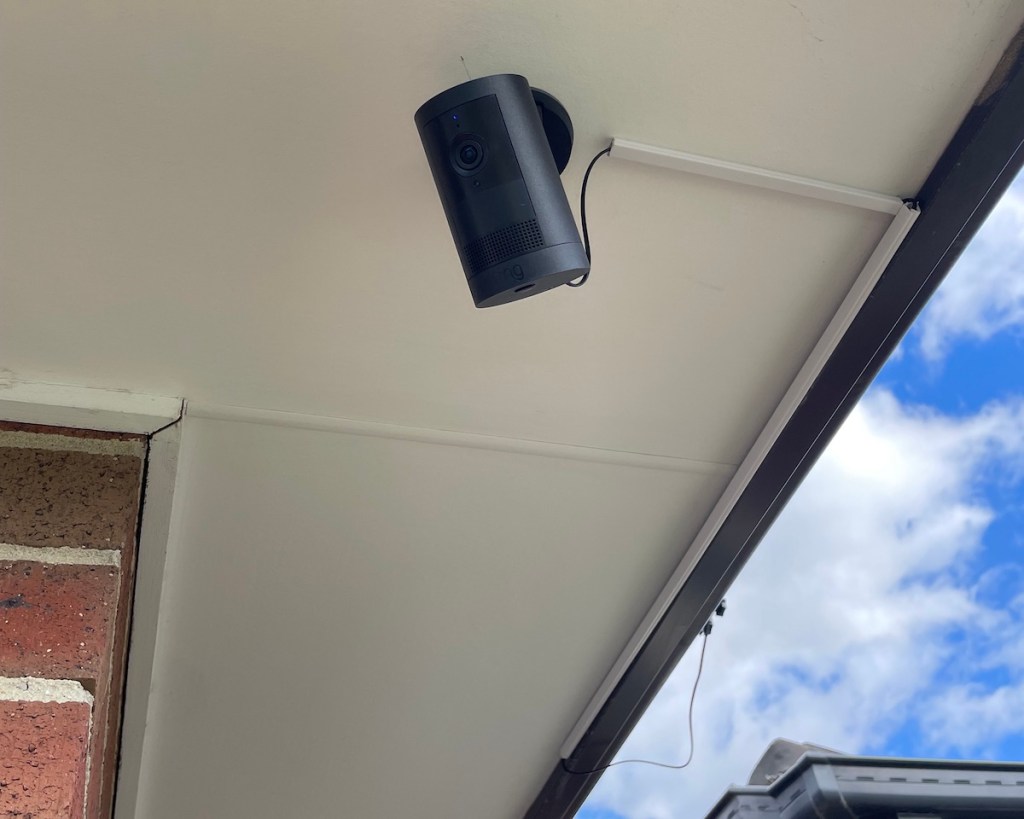
Here’s the bottom view of the solar panel (this is as far as me + my ladder can reach). You can see the gutter mount in action – feels pretty stable.
Here’s how it looks like from the corner. I mounted the solar panel on the side just so it’s hidden from the front view. I think it looks neat.
Review
It’s been up for about a week now and I’ve been looking at the battery to see if the solar panel is working. Well, it’s the peak of winter, the least amount of sun for the year but it’s holding up pretty well. Battery drops to 97% and goes back up to 100%. I may not have to charge this thing unless something gets broken.
What remains to be seen is, will the gutter mount hold up to the Melbourne occasional wild gusts of wind? Or, how long can it remain functional under the scorching summer heat and freezing winter cold? Only time will tell.
Final Thoughts
Do I like this product? Yes. Is it the best option? It depends. If you have the money, go for a fully wired system and have a professional do it.
But if like me, you like getting your hands a bit dirty, you like getting your tools out from the shed, you want a quick solution – this is the way to go.
In terms of cost, it has a low upfront cost if you DIY. I consulted a trusty expert, ChatGPT, and it said, considering Ring’s monthly subscription plus the unit costs, vs. the cost of a professionally installed wired system, Ring will get more expensive at around 6 years of continuous subscription – for me that’s acceptable. Having 3 working cameras starts to feel like it’s a legit system now, as opposed to a “band-aidy” solution.
Now I’m excited to see someone drop off a trolley. I can either trigger the alarm, maybe scream at them because it has a “speak” feature. Or maybe I’ll bark at the cat who keeps doing #2s in my planter box. It would be hilarious to see these kids and the cat jump. I don’t know – what would you do?
